Certified Business
With over 10,000 orders
With over 10,000 orders

Photo by Clay Banks on Unsplash
Buying a new pair of hiking boots is an exciting first step toward your next big adventure. But let me tell you from experience, taking them straight from the box to a 10-mile trail is a rookie mistake that your feet will never let you forget. The best way to break in hiking boots isn't a quick fix; it's a patient, step-by-step process that lets the boot materials mold perfectly to your feet. This is how you prevent those trip-ruining blisters and hot spots.
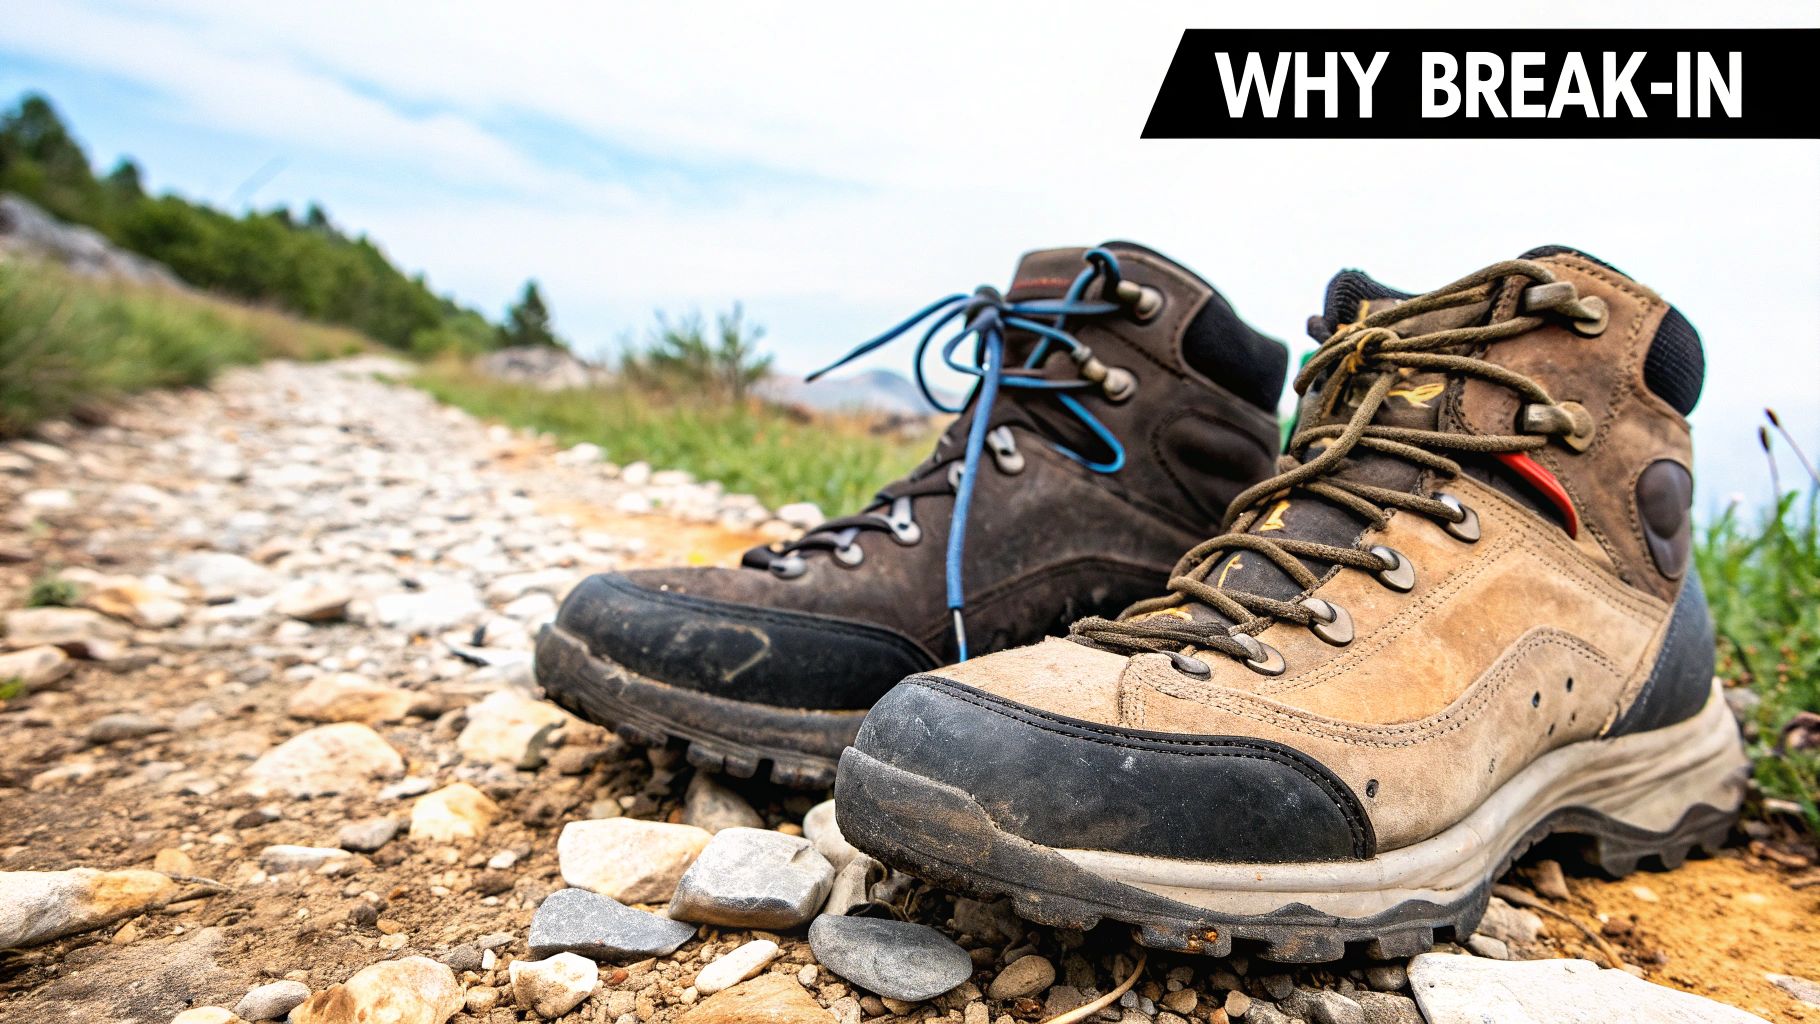
That ‘new boot’ stiffness isn't a badge of quality you should tough out on the trail. It’s a problem you need to solve before you even leave the house. Every single hiking boot, from old-school full-grain leather to the latest synthetics, is built around a generic "last"—a standard foot-shaped model. The break-in process is how you turn that generic form into a custom-fit piece of gear.
Think of it as an introduction. Your foot and the boot need to get to know each other. As you wear them, your body heat softens the materials, particularly around those notorious friction zones like your heel and the balls of your feet. With every step, the boot’s footbed, ankle collar, and flex points start to give, conforming to your unique stride.
There's a direct, undeniable link between a good break-in period and avoiding pain on the trail. Skip it, and you're just setting yourself up for a miserable time.
A hike cut short by foot pain is a classic, and totally preventable, story. The goal is simple: make the boot feel less like a piece of gear and more like a comfortable, supportive part of your own foot.
Honestly, skipping the break-in process is one of the biggest blunders a hiker can make. It’s no surprise that blisters and foot injuries are among the most common complaints you hear out on the trail. A proper break-in period drastically cuts down that risk. In fact, many trail-related foot issues are tied directly to boots that are either ill-fitting or haven't been broken in. You can learn more about preventing these common problems from Backpacker.com.
This isn't just about avoiding a little discomfort. It’s about your safety and your ability to actually enjoy the incredible places your boots are meant to take you.
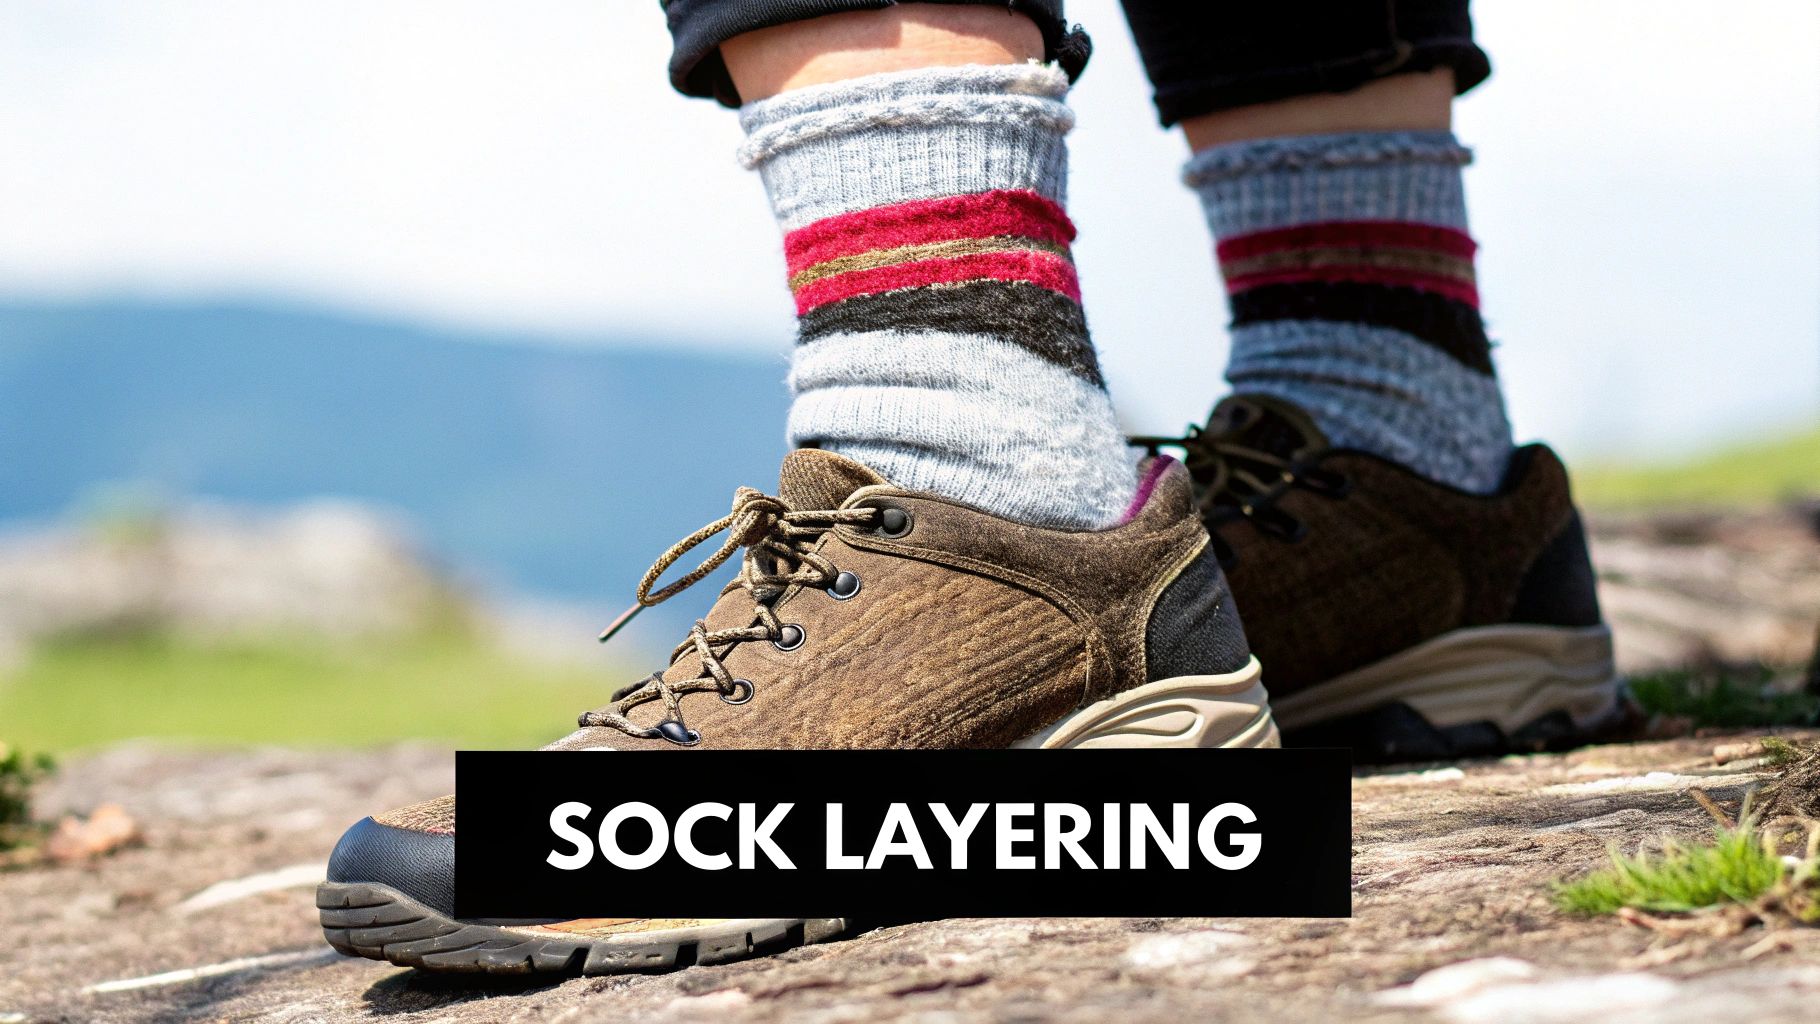
Before you even think about taking that first step outside, let's get your gear dialed in. Properly breaking in a pair of boots is less about the boots themselves and more about creating the perfect environment for your feet. This all starts with your socks.
Seriously, don't overlook your socks. They are your feet's first line of defense against the friction that causes those dreaded blisters.
Rule number one: ditch the cotton. Cotton socks are a hiker's worst enemy. Instead, grab the exact socks you plan to wear on the trail, ideally a good pair made from merino wool or a high-quality synthetic blend. These materials are non-negotiable because they pull sweat away from your skin, which is the key to keeping your feet dry and blister-free. Consistency is crucial, so wear these same socks every time you put on your new boots.
Alright, socks on. Now's the moment for one last, critical fit check. If you rely on special insoles or custom orthotics for arch support, put them in the boots now. Don't wait. The boots need to mold to the complete setup you'll be hiking in.
Lace up your boots so they're snug, but not strangling your feet, and just walk around your house for a bit. Be brutally honest with yourself and pay close attention to any red flags.
Let me be blunt: no amount of "breaking them in" will ever fix a boot that just doesn't fit. If you feel any of those deal-breakers, stop right there. It’s a sign to return the boots, not a challenge to tough it out.
Getting this right from the beginning is the smartest move you can make. For a much deeper look at picking the right pair in the first place, our hiking footwear guide on how to choose hiking boots is a great resource.
Thinking about the bigger picture, incorporating proven strategies for preventing foot and ankle pain into your routine will set you up for many miles of happy hiking.
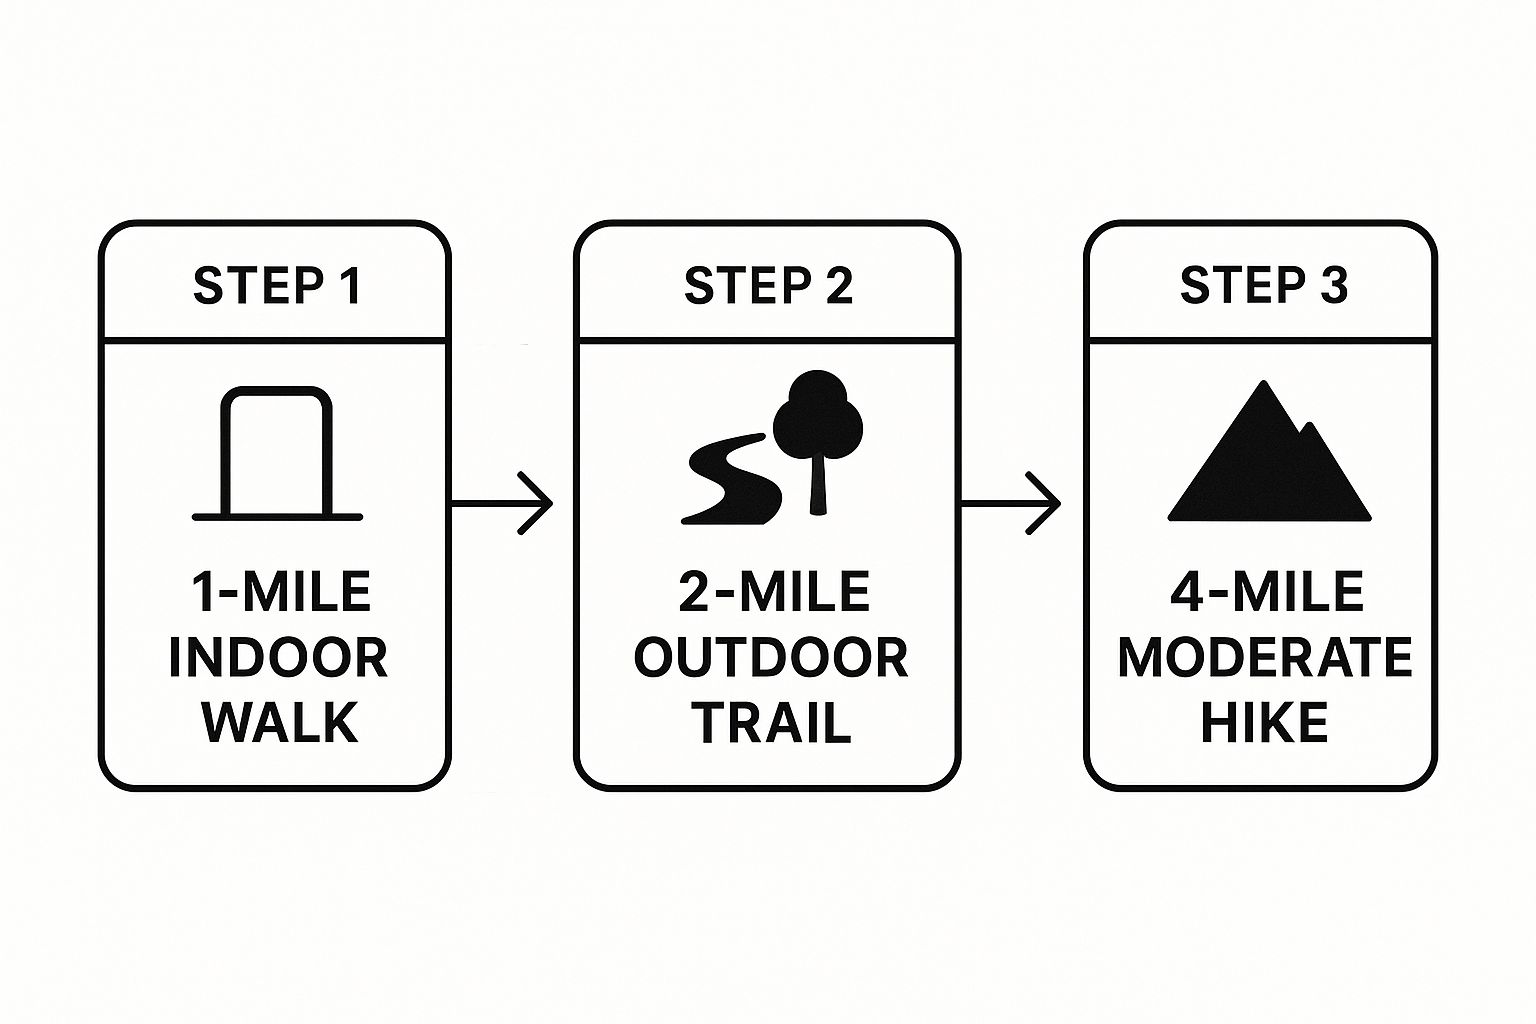
Before you even think about hitting a dusty trail, your boot-breaking journey needs to start right in your own home. Seriously. The living room carpet is your first proving ground, and this initial, low-impact phase is probably the most important step of all.
This is your golden opportunity to let the boots begin conforming to your feet in a completely controlled environment. As you wear them, the heat from your body gently warms up the materials, especially the foam, leather, and synthetic fabrics around the collar and in the footbed. This makes everything more pliable, encouraging the boot to slowly mold to the unique shape of your feet, arches, and ankles.
It’s like a soft launch for your feet.
The name of the game here is gradual. Don't just lace them up and commit to a full eight-hour day. That's a recipe for sore feet. Instead, think about a simple, progressive schedule that lets your feet and the boots get acquainted.
Kick things off by wearing them for just an hour or two each day while you do your normal stuff around the house.
This isn't just about logging miles. It's about letting the boots experience the natural flex of your feet without the punishing impact of a real trail.
This indoor period is your final, critical gear check. Pay close attention. If you feel any significant pinching, rubbing, or hotspots after just a couple of hours, that's a massive red flag. This is your last chance to return or exchange the boots before they get scuffed up outside.
Most experts agree that this initial phase is non-negotiable. Breaking in boots is a deliberate process, and it all starts with wearing them for two to three hours indoors. This kicks off the molding process while keeping your return option open if they just aren't right. As you can discover more guidance on Mammut.com, this first step is crucial.
Over a week, slowly ramp up your indoor wear time. Try adding an hour each day until you can comfortably keep them on for a full afternoon without a single complaint from your feet.
Alright, you've successfully paraded around your living room, and your boots are starting to feel less like rigid boxes and more like actual footwear. Now it's time to take them out into the real world.
This is where the rubber really meets the road—or, in this case, the pavement. Start by working your boots into your daily life. Wear them to walk the dog, on a trip to the grocery store, or for a casual walk through a local park. The idea is to get your feet moving on flat, predictable surfaces like sidewalks and manicured paths.
You're not trying to set any distance records here. This step is all about discovering those sneaky little pressure points and friction spots that only reveal themselves after you've been walking for a bit.
The goal is simple: gradually increase the time on your feet and the variety of terrain. This slow, steady approach lets your boots and your feet get acquainted properly, preventing a world of hurt later on.
This might be the single most important piece of advice I can give you: pay attention to what your feet are telling you. What feels like a minor annoyance now can quickly blossom into a trip-ruining blister on the trail.
If you feel a "hot spot" – that telltale sign of friction and rubbing – stop immediately. Seriously. Don't be a hero and try to push through it. Take a moment to adjust your laces, smooth out a wrinkled sock, or apply a blister bandage before it becomes a problem.
As you gain confidence, start upping the ante. A great next step is to add a weighted daypack to your walks. Once that feels comfortable, it's time to find some gentle, off-pavement trails. This is where your boots will finally face the challenge of uneven ground, which is the ultimate test.
Remember to stay hydrated on these initial walks, as even a short trek can be more demanding than you think. For more on that, check out our guide on how to prevent dehydration while hiking.
Every pair of boots is different, and the break-in timeline depends heavily on the materials. A lightweight synthetic boot will be trail-ready much faster than a burly, full-grain leather one.
Here’s a rough guide to give you an idea of what to expect.
| Phase | Lightweight Synthetic Boots | Midweight Leather/Synthetic Boots | Heavy-Duty Full-Grain Leather Boots |
|---|---|---|---|
| Wear Around the House | 1-3 days (1-2 hours/day) | 3-5 days (1-2 hours/day) | 5-7 days (2-3 hours/day) |
| Short Outdoor Walks | 2-4 walks (30-60 mins) | 4-6 walks (30-90 mins) | 6-10 walks (1-2 hours) |
| Hikes with a Daypack | 1-2 short hikes (1-3 miles) | 2-4 moderate hikes (2-5 miles) | 4-6 moderate hikes (3-6 miles) |
Think of this as a flexible roadmap, not a strict set of rules. The key is to listen to your feet and progress at a pace that feels comfortable for you and your new boots.
Alright, you've worn your boots around the house and on errands. Now it's time for the real deal: taking them out to their natural habitat. This is the final dress rehearsal, your chance to see how they perform on actual dirt, rock, and hills before you're miles from civilization.
Don't just pick any path. Start with a short, familiar trail that has a bit of varied terrain. You need some gentle inclines and declines to truly test the fit. Walking on a flat path just won't cut it—your foot moves completely differently when you're heading uphill versus downhill, and you need to know if any new friction spots will appear.
To really simulate a hike, you need to hike with weight. Throw on a daypack with 10-15 pounds of gear. Water, a rain jacket, and snacks all add up. This added weight changes your posture and how your feet land, putting more pressure on the soles and potential hot spots. It's a crucial part of the test.
As you walk, become hyper-aware of what your feet are telling you. Your mission here is to find problems before they become full-blown blisters.
My biggest piece of advice for this stage is something I never skip: always have your old, trusted boots in the car. If a hot spot suddenly flares up a mile into your hike, being able to swap shoes turns a hike-ending problem into a minor annoyance. Trust me on this one.
Think of this as the final exam for your boots. Being thorough now saves you a world of pain later and gives you the confidence to tackle bigger adventures.
Even the most seasoned hikers have questions when it comes to getting a new pair of boots trail-ready. Having a solid game plan is one thing, but running into a specific issue can throw you for a loop. Let's tackle some of the most common questions we get, so you can break in your boots with confidence.
Trust me on this one: you'll just know. It's less about hitting a certain number of miles and more about how they feel. Your boots are officially good to go when you can wear them for hours on different types of terrain without even a hint of a hot spot, a pinch, or any nagging discomfort.
They should feel like a supportive, natural extension of your own feet.
You're looking for a few key signs:
The real goal is to get to a point where your boots are so comfortable you completely forget you're wearing them. That's the sweet spot.
This is an old-school myth that just won't seem to go away. Please, whatever you do, avoid the "soak and walk" method with modern hiking boots. It's a fast track to ruining your expensive gear.
Soaking leather strips it of its natural oils, which are essential for keeping it supple and durable. This can lead to premature cracking and a seriously shortened lifespan for your boots.
But the damage goes deeper than just the leather. Soaking your boots can weaken the glues and adhesives that hold the entire structure together, from the sole to the upper. Not only does this compromise the boot's integrity, but it will almost certainly void your manufacturer's warranty.
A gradual, dry break-in process is always the safer, more effective route. It protects your investment and ensures your boots perform as they should for years to come. Making a simple mistake here is just one of the 10 common hiking mistakes to avoid.
And remember, preparing your boots is only half the battle. It's also worth strengthening your feet for improved comfort, which can make a huge difference in how you feel on any trail.
At TREKOLOGY, we design gear to keep you comfortable and confident on every adventure. From our supportive trekking poles to our ultra-comfortable camp pillows, our equipment is engineered to enhance your outdoor experience. Explore our full collection of thoughtfully designed gear at https://trekology.com.
Leave a comment