Certified Business
With over 10,000 orders
With over 10,000 orders

Photo by Lucas Clara on Unsplash
New to hiking? Welcome to the club—where the trails are winding, the views are breathtaking, and preparation is everything. Every experienced hiker will tell you that staying safe on the trail isn’t about luck; it’s about knowledge, planning, and respect for the great outdoors. If you're just starting out, it can be easy to overlook basic safety measures in all the excitement. But nature doesn’t care if it’s your first hike or your fiftieth—so being prepared matters. In this blog, we’ll walk you through 7 must-know hiking safety tips every beginner should follow. These aren’t just good suggestions—they’re habits that could one day save your life and make your outdoor experiences that much more rewarding.

Photo by Vitaly Gariev on Unsplash
Leaving a detailed trip plan with a trusted person is one of the most critical hiking safety tips you can follow. It is your primary safety net, transforming a potentially dire situation into a manageable one by creating a clear trigger for when help is needed. If you don't return by your designated time, your contact knows exactly when to alert authorities and can provide them with the information needed for a swift and targeted response.
This simple act dramatically improves the efficiency of Search and Rescue (SAR) operations. Instead of a wide, resource-intensive search, a detailed plan narrows the search area, saving precious time. The infamous story of Aron Ralston, whose ordeal was depicted in 127 Hours, is a stark reminder of this; had someone known his exact climbing location in Bluejohn Canyon, his rescue would have taken hours, not days.
A truly effective plan goes beyond a simple "I'm going hiking at the state park." It needs to be specific, actionable, and thorough. Your goal is to give your contact a complete picture of your outing, leaving no room for guesswork.
Here are the essential components to include:
To help you organize these details, the following summary box breaks down the core elements of a rock-solid hiking plan.
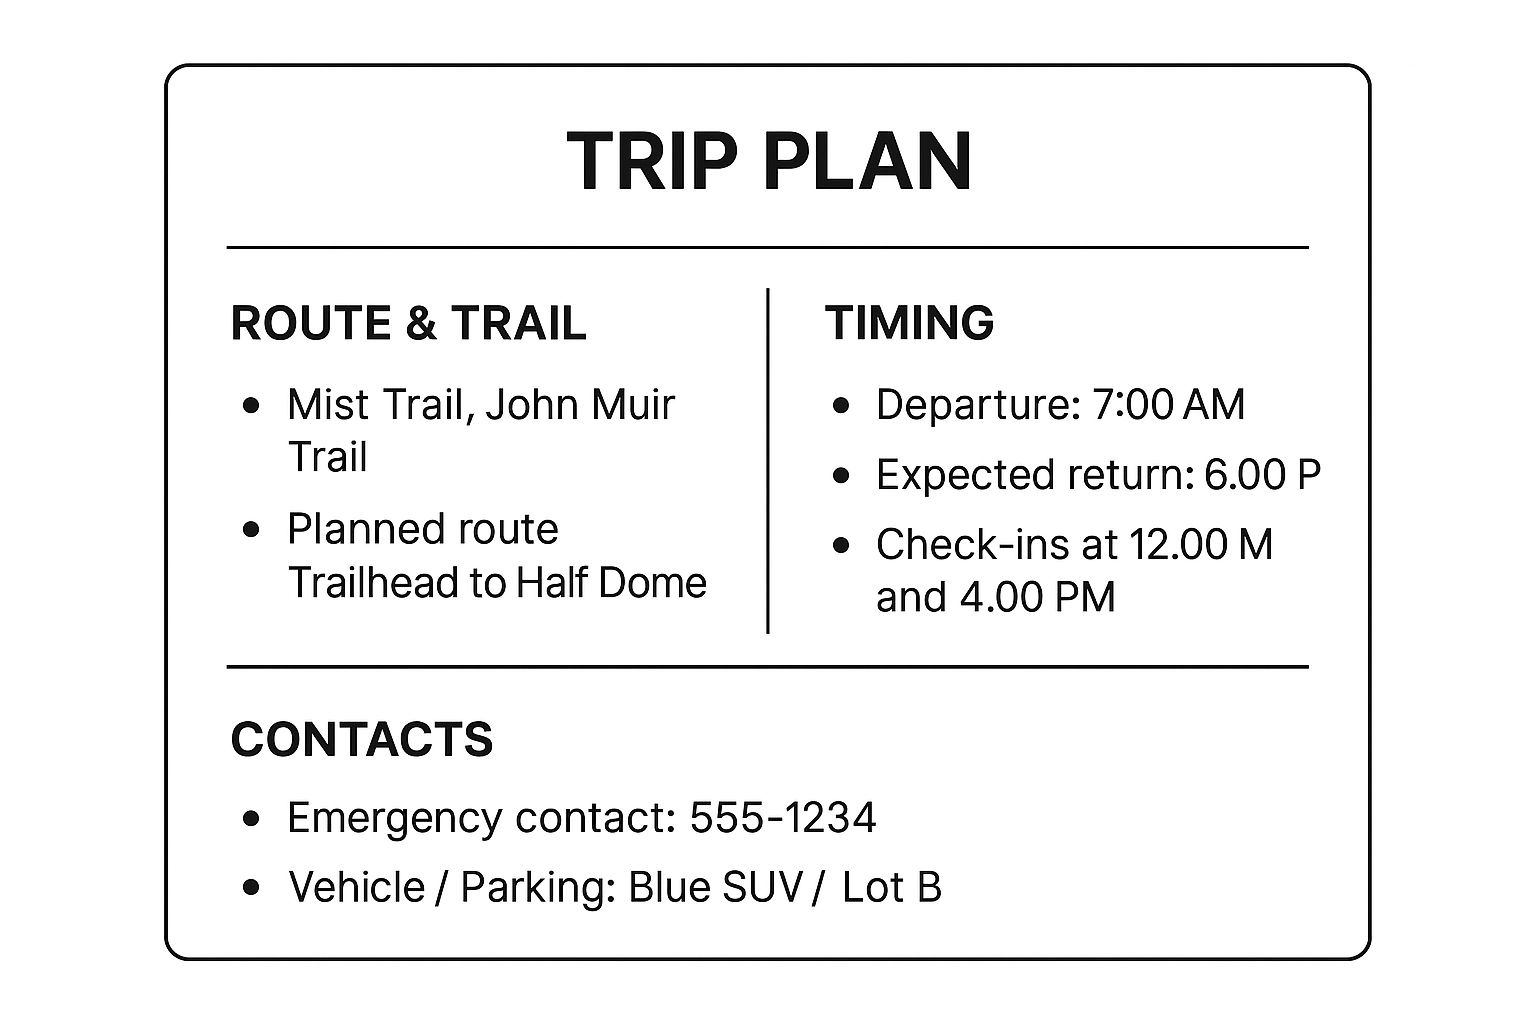
This quick reference visualizes the three pillars of your safety plan: your route, your timeline, and your personal contact information. Remember to share your live location using an app like AllTrails or Gaia GPS and, most importantly, always notify your contact the moment you return safely to prevent a false alarm.

Photo by Hendrik Morkel on Unsplash
Carrying the "10 Essentials" is a fundamental principle of hiking safety, promoted by seasoned organizations like The Mountaineers and REI Co-op. This isn't just a gear list; it's a systems-based approach to preparedness. Rather than focusing on ten specific gadgets, it identifies ten functional categories of gear designed to help you survive unexpected scenarios, from a sudden storm to getting lost overnight. Following this system ensures you have the critical tools to manage emergencies and turn a potential crisis into an inconvenient but safe situation.
The value of this system is proven time and again in countless survival stories where a simple item like an emergency blanket or a headlamp made the difference. It forces you to think beyond the best-case scenario and prepare for what could go wrong. By packing these items, you equip yourself to handle issues with navigation, injuries, weather changes, and extended time outdoors, making it one of the most reliable hiking safety tips you can adopt.
A well-curated kit is tailored to your specific trip while covering all essential survival functions. The goal is to be prepared without being overburdened. This means selecting lightweight, multi-functional items whenever possible and understanding how to use each one before you hit the trail.
Here are the ten functional systems to cover:
To see these principles in action and get a visual guide to assembling your kit, this video offers an excellent overview.
Remember to adjust your kit for every hike based on the season, terrain, and duration. For a deeper dive into specific gear choices, you can learn more about the 10 essential survival items for every hiker on trekology.com. Always check your gear before you leave, replacing expired items and ensuring everything is in working order.
Weather awareness is a fundamental pillar of hiking safety, as ignoring it can transform a pleasant day on the trail into a life-threatening emergency. Weather-related incidents are a leading cause of Search and Rescue missions, often because hikers underestimate how quickly conditions can deteriorate, especially in mountainous or exposed terrain. Diligently checking forecasts is not just about deciding what to wear; it's about making critical decisions on whether to go, when to turn back, and what emergency gear to pack.
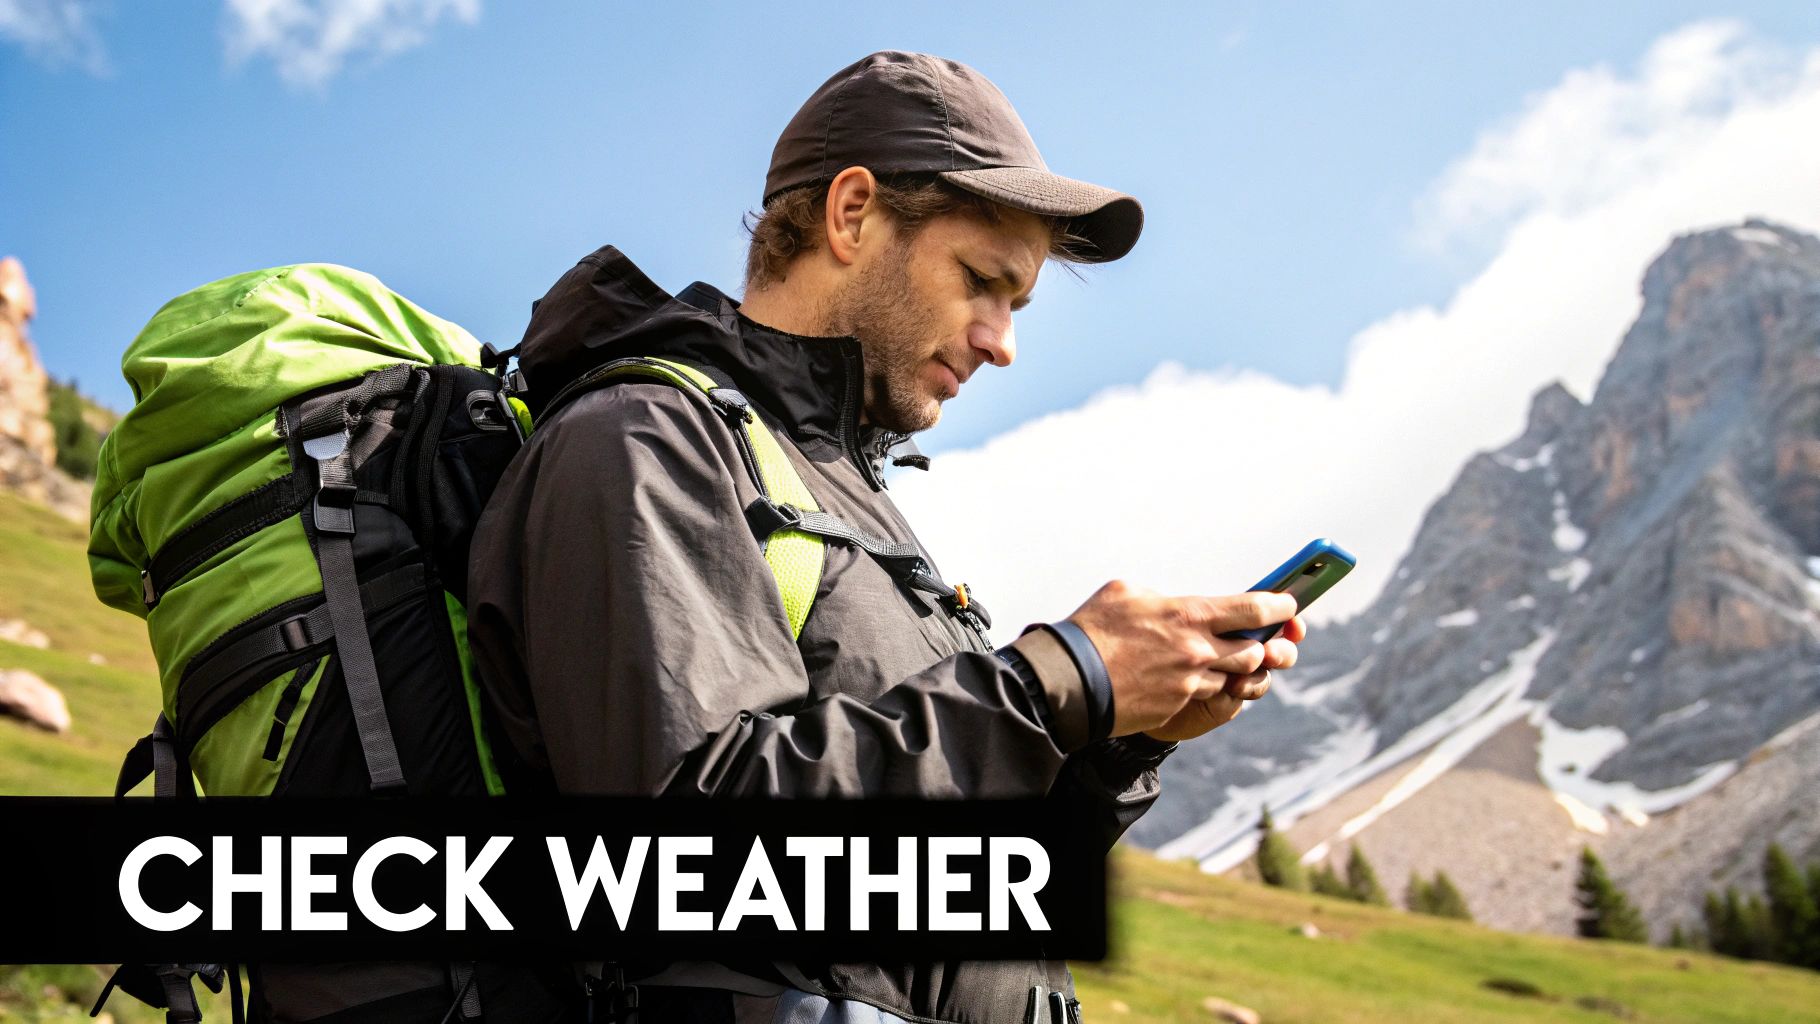
The deadly potential of sudden weather shifts is well-documented. Many rescues in New Hampshire's White Mountains involve hikers caught by unexpected storms, suffering from hypothermia in summer due to inadequate preparation. Similarly, the frequent lightning strikes on exposed peaks serve as a grim reminder that a sunny start doesn't guarantee a safe finish. These situations underscore why proactive weather monitoring is one of the most vital hiking safety tips.
A reliable weather assessment involves more than a quick glance at your phone's default weather app. It requires consulting multiple, specialized sources and understanding the specific microclimates of your hiking area. Your goal is to build a comprehensive forecast that accounts for elevation, terrain, and regional weather patterns.
Here are the essential components for a proper weather check:
To help you remember these crucial steps, the following summary box breaks down the core elements of effective weather preparation. This visual guide reinforces the three pillars of weather safety: checking multiple sources, understanding elevation changes, and learning to interpret natural signs. Remember to set a predetermined turnaround time, especially in areas prone to afternoon thunderstorms, and always pack layers for changing conditions.

One of the most foundational hiking safety tips is conducting an honest self-assessment of your abilities before stepping onto the trail. Overestimating your fitness, skill, or experience can quickly turn a fun adventure into a dangerous ordeal. Choosing a trail that aligns with your current capabilities is crucial for preventing exhaustion, injury, and the need for rescue.
This principle of self-awareness is a cornerstone of outdoor education, championed by organizations like the National Outdoor Leadership School. Many high-profile rescue incidents, from hikers underestimating the Grand Canyon's steep and exposed conditions to those caught unprepared by Mount Washington's volatile weather, often stem from a mismatch between the trail's demands and the hiker's readiness. Acknowledging your limits isn't a sign of weakness; it's a mark of a smart, seasoned adventurer who prioritizes safety over ego.
A proper assessment involves looking beyond just your physical fitness. It requires a holistic view of your preparedness, from your navigation skills to your mental fortitude when faced with unexpected challenges. Identifying the best walking trails in Northumberland or anywhere else starts with knowing what you can realistically handle.
Here are the key areas to evaluate when choosing a trail:
Remember, the goal is to challenge yourself, not endanger yourself. Always have a backup plan or a designated bail-out point, especially on longer or more remote routes. If a trail seems beyond your current skill set, consider hiring a guide or choosing a different objective. There is no shame in turning back to hike another day.

Photo by Erik Mclean on Unsplash
Adhering to designated paths is a foundational hiking safety tip that protects both you and the environment. Marked trails are the established, safest routes through a given terrain, designed to avoid hazards like unstable ground, dense vegetation, or sensitive wildlife habitats. Straying from the path dramatically increases your risk of getting lost, encountering unexpected dangers, and causing ecological damage.
This practice also encompasses trail etiquette, which ensures a safe and positive experience for everyone. Following simple right-of-way protocols prevents collisions and conflicts, creating a respectful shared space. For instance, the extensive boardwalk systems in Yellowstone National Park are a clear example of this principle in action; they keep visitors safe from dangerously hot thermal features while protecting the fragile ecosystem, demonstrating how trail adherence is a dual-purpose safety measure.
Effective trail discipline means being actively aware of your surroundings and your impact on others. It involves understanding trail markers and knowing the unwritten rules of sharing the path, which are crucial for preventing accidents and preserving the trail system for future hikers.
Here are the essential components of staying on track and being a courteous hiker:
To help you remember these critical on-trail behaviors, the summary box below outlines the core elements of responsible trail use. Learn more about the specific rules of the trail with this guide on hiking etiquette on trekology.com.

Photo by Jackson Hirsch on Unsplash
Proper hydration is one of the most fundamental hiking safety tips, as dehydration can rapidly impair physical performance, cognitive function, and your body's ability to regulate temperature. Neglecting your fluid intake can lead to fatigue, headaches, and dizziness, which severely increases the risk of stumbling or making poor navigational choices. In more serious cases, it can escalate to life-threatening conditions like heat exhaustion or heat stroke.
Carrying enough water isn't just about quenching your thirst; it's a critical component of your energy management and emergency preparedness. Organizations like NOLS Wilderness Medicine emphasize that maintaining hydration is as crucial as carrying a first-aid kit. For example, rangers in the Grand Canyon recommend hikers carry at least one gallon (about four liters) of water per person per day during the summer, a guideline that underscores how environmental conditions dramatically alter your fluid needs.
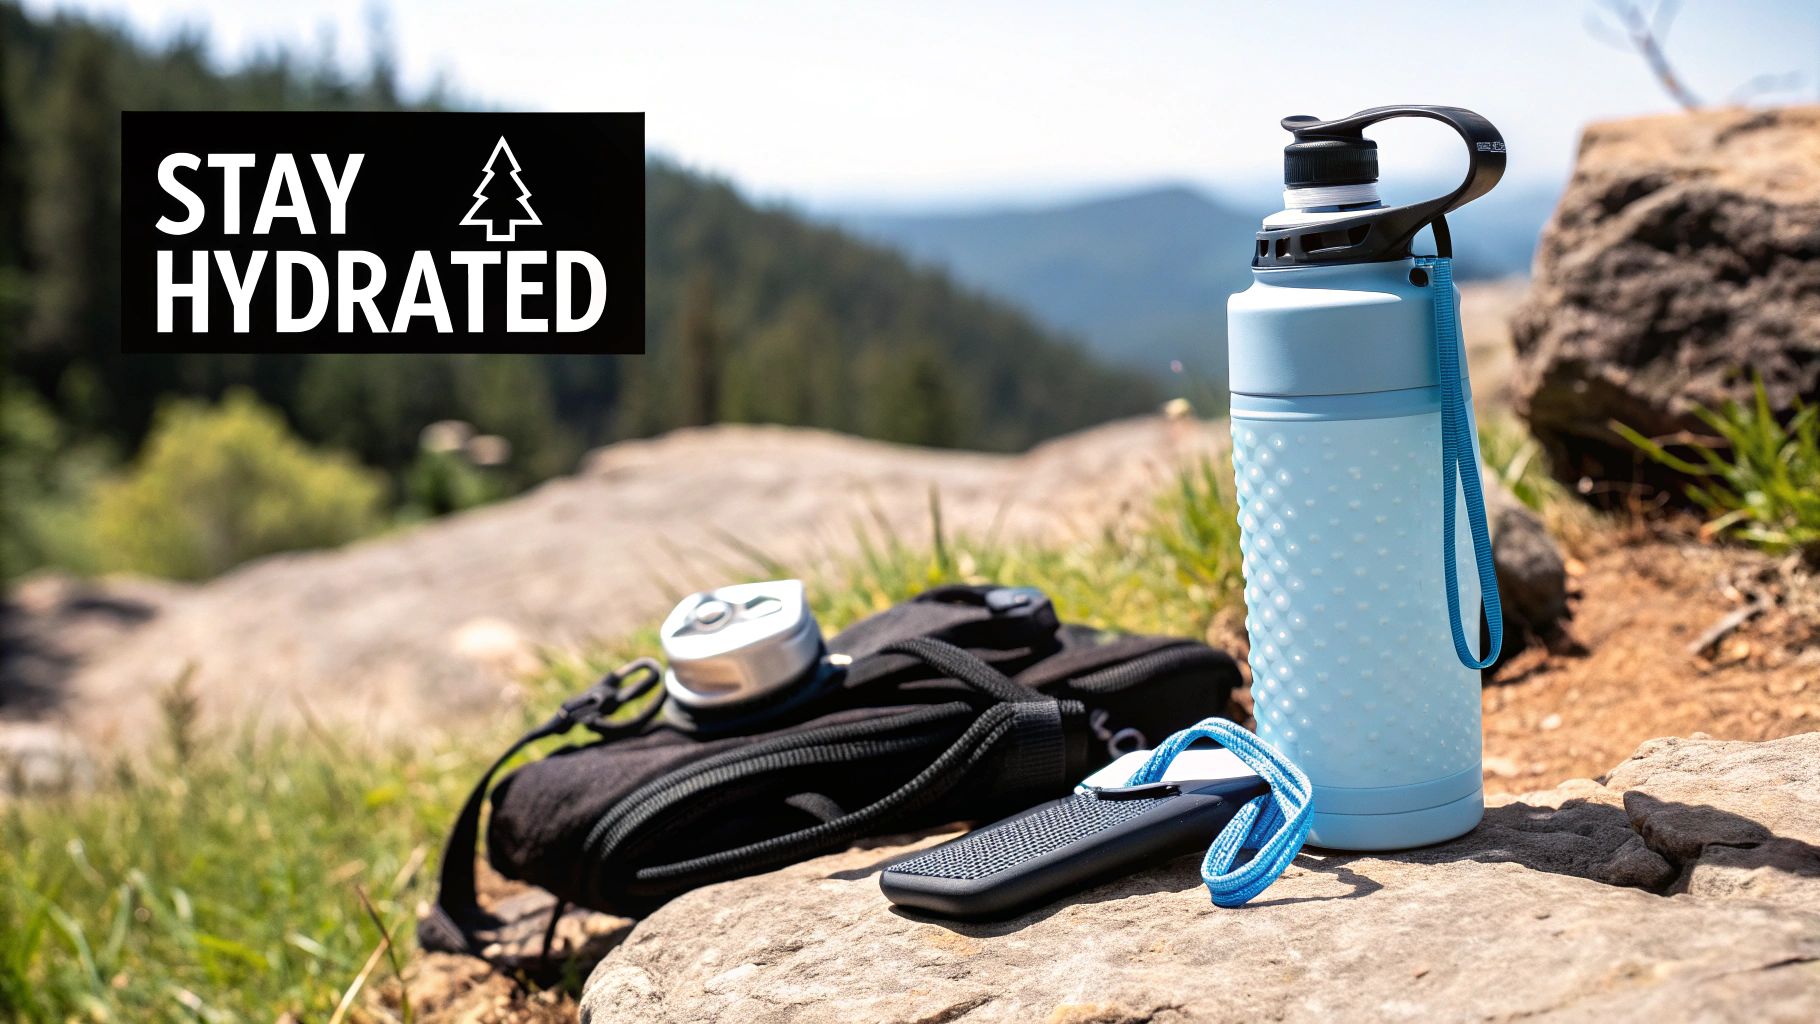
A proactive hydration strategy begins before you even hit the trail and continues throughout your hike. It involves understanding your body's needs, planning for your specific environment, and always having a backup plan for obtaining safe drinking water.
Here are the essential components for staying properly hydrated:

Photo by Dmitriy Suponnikov on Unsplash
Relying solely on a cell phone for help is a dangerous gamble, as service is often nonexistent in remote backcountry areas. Carrying a dedicated emergency communication device is a critical hiking safety tip that provides a reliable lifeline when you are outside cellular range. These devices bridge the communication gap, allowing you to signal for help, share your precise location, and communicate with emergency services or loved ones, transforming a potential crisis into a coordinated rescue.
This technology offers a powerful safety net that has proven its worth time and again. For instance, devices like the Garmin inReach have facilitated thousands of successful rescues globally, from injured climbers on remote peaks to lost hikers in dense forests. Similarly, SPOT beacons were instrumental in rescuing stranded hikers in the Appalachian Mountains during Hurricane Sandy. These real-world successes underscore the value of having a direct link to help when you need it most.
Simply owning a device is not enough; you must know how to use it correctly and ensure it is ready for an emergency. Proper setup, practice, and accessibility are key to making this gear effective. Your goal is to make its use second nature so you can operate it confidently under stress.
Here are the essential steps to prepare your device:
To help you remember the crucial steps for device readiness, the following summary box breaks down the core elements of proper management.
This quick reference visualizes the three pillars of device preparedness: understanding its function, proper maintenance, and knowing when to activate it. Always integrate your device into your trip plan by sharing its tracking link and, crucially, practice using its non-emergency features so you are familiar with its operation before a real incident occurs.
| Safety Measure | Implementation Complexity 🔄 | Resource Requirements ⚡ | Expected Outcomes 📊 | Ideal Use Cases 💡 | Key Advantages ⭐ |
|---|---|---|---|---|---|
| Tell Someone Your Hiking Plan | Low to Moderate: Requires advance planning | Minimal: Communication tools/apps | Faster rescue response, enhanced safety | All hikes, especially backcountry and remote areas | Critical life-saving practice; peace of mind for all |
| Carry the 10 Essentials | Moderate: Gear selection and prep required | High: Purchase of multiple items, training | Comprehensive emergency preparedness | Any hiking environment; multi-day or remote trips | Standardized gear checklist; adaptable to conditions |
| Check Weather Conditions and Forecasts | Moderate: Research and monitoring needed | Low to Moderate: Access to weather sources | Avoidance of dangerous weather; informed decisions | All hikes, especially in mountainous or variable climates | Prevents weather-related emergencies; improves comfort |
| Know Your Limits and Choose Appropriate Trails | Low to Moderate: Honest assessment and research | Minimal: Requires self-awareness, info access | Reduced accidents; safer, enjoyable hikes | Beginners to advanced hikers planning routes | Reduces risk and resource strain; promotes progression |
| Stay on Marked Trails and Follow Trail Etiquette | Low: Following rules and signs consistently | Minimal: Knowledge of trail etiquette | Lower environmental impact; reduced getting lost | All hiking, especially popular and fragile ecosystems | Protects environment; ensures trail sustainability |
| Carry Adequate Water and Stay Hydrated | Moderate: Calculation and carrying required | Moderate: Water containers, purification gear | Prevents dehydration; maintains endurance | All hikes, critical in hot, dry, or remote areas | Essential for health; enables longer/safer trips |
| Carry Emergency Communication Devices | Moderate to High: Device knowledge and use | High: Cost of devices and subscriptions | Immediate rescue coordination and location sharing | Remote hikes without cell coverage; high-risk terrain | Saves lives remotely; direct contact with emergency |
Embarking on a hike is an investment in your physical and mental well-being, but the greatest returns come when you prioritize safety above all else. The hiking safety tips we've covered—from communicating your plan and mastering the 10 Essentials to respecting your limits and staying hydrated—are not merely rules to follow. They are tools that empower you to face the unexpected with skill and composure, transforming potential emergencies into manageable situations. Think of this knowledge as the most critical piece of gear in your pack, one that weighs nothing but carries the most value.
True preparedness isn't about ticking boxes before you leave the trailhead; it's about cultivating an ingrained mindset of awareness. It’s about making the decision to turn back when the weather turns, even if the summit is in sight. It's about pulling out your map and compass to confirm your location, not because you are lost, but to prevent yourself from becoming lost.
This proactive approach is built on a few core pillars discussed throughout this guide:
Mastering these hiking safety tips does more than just protect you on a single trip; it builds a foundation for a lifetime of confident and responsible adventure. Every hike where you return safe and sound reinforces these positive habits, making them second nature. This consistency also allows you to push your boundaries safely, taking on more challenging trails as your skills and conditioning improve. Part of that long-term readiness is ensuring your body can handle the strain of repeated adventures. For long-term hiking enjoyment and consistent readiness, prioritize proper physical recovery. Learn more about effective muscle regeneration strategies to keep yourself in top form.
By integrating these practices into every outing, you transform preparedness from a task into a habit. You equip yourself not just with quality gear, but with the wisdom to use it effectively. This ensures that every step you take on the trail is one that leads you toward another great adventure and safely home again.
Ready to gear up for your next safe adventure? TREKOLOGY designs innovative, reliable, and lightweight gear, from trekking poles that enhance stability to camp pillows that ensure a restful night. Equip yourself with thoughtfully engineered products that make safety and comfort accessible on every trail.
Leave a comment