Certified Business
With over 10,000 orders
With over 10,000 orders

Photo by Lucas Canino on Unsplash
Ever feel like your backpack is actively trying to pull you over backward on a steep trail? It’s a miserable feeling, and it’s not just in your head—it’s a classic sign of a poorly packed bag. Learning how to properly distribute the weight in your pack is probably the single most important skill you can master to make hiking more enjoyable. It's the difference between a grueling slog and a comfortable journey, all by making your gear work with your body instead of against it. In this guide, we’ll walk you through pro-level techniques for balancing backpack weight so you can hike farther, feel better, and enjoy the outdoors the way it’s meant to be.

Photo by Alex Moliski on Unsplash
Here’s the secret seasoned hikers know: a comfortable hike isn't just about what you pack, but how you pack it. A well-packed backpack should feel like an extension of your own body. When the weight is distributed correctly, it syncs up with your natural center of gravity, leaving you feeling more stable, agile, and full of energy.
An improperly packed bag does the exact opposite. It creates a constant tug-of-war between you and your gear, pulling you off-balance with every single step. This forces your core, shoulders, and back to work overtime just to keep you upright, which leads to that all-too-familiar fatigue and soreness. It’s the very reason a 30-pound pack can feel like 50 pounds by the end of the day.
The fundamental idea behind smart packing is to keep your heaviest items high up and snug against your spine. This simple adjustment keeps your center of gravity where it should be, eliminating that dreaded backward-pulling sensation. A high center of gravity allows your hips—the powerhouse of your body—to shoulder most of the load, taking the stress off your much more delicate shoulders and neck.
This is why experienced backpackers follow a specific loading strategy. A good rule of thumb is that roughly 60-70% of your pack's total weight should be concentrated in the upper-middle section, right between your shoulder blades and close to your back. Packing this way helps you stand up straight, which is absolutely critical for maintaining balance and preventing back pain on long treks. If you're curious about how these ergonomic principles influence gear design, you can find more details in this US backpack market report.
For a quick reference, here’s a breakdown of how to think about your pack in zones.
This table simplifies the core principles of packing your backpack. Think of your pack as having four key zones, each with a specific purpose for balancing your load.
| Pack Zone | Ideal Gear Type | Why It Works |
|---|---|---|
| Bottom (Base) | Bulky, lighter items like a sleeping bag or spare clothes. | Creates a stable foundation without pulling your center of gravity down. |
| Middle (Core) | Your heaviest gear: food, water bladder, stove, bear canister. | Keeps dense weight high and close to your spine, aligning with your center of gravity. |
| Top (Lid/Upper) | Essentials you need often: rain jacket, first-aid kit, map, headlamp. | Allows for quick access without having to unpack everything on the trail. |
| Accessory Pockets | Small, frequently used items: snacks, sunscreen, phone, GPS. | Puts "on-the-go" items within easy reach so you don't have to stop. |
Following this zone-based system is the most reliable way to build a stable, comfortable load every single time.
Key Takeaway: Your goal is to create a tall, stable column of weight that moves with you, not against you. A low-slung, sagging pack will always feel heavier and more unstable.
This strategic approach isn't just about comfort—it's a critical safety measure. When you're navigating tricky terrain like a rocky scramble or a narrow ledge, solid balance can be the difference between a confident step and a dangerous slip. By learning to distribute weight effectively, you’re not just packing smarter; you’re hiking safer and preserving your body for many more adventures to come.

Photo by Ali Kazal on Unsplash
Alright, let's move past the "just stuff it all in and hope for the best" method. If you want to hike comfortably, you have to think like a seasoned pro. Your backpack isn't just one big sack; it's a system of distinct zones designed to work with your body, not against it.
Nailing how you use these three zones is the secret to proper backpack weight distribution.
The goal is to build a tall, dense column of gear that sits snugly against your back. This stops everything from shifting around, which creates a pendulum effect that can throw you off balance and suck the energy right out of you with every single step.
The very bottom of your pack is reserved for bulky gear you won't need until you’ve set up camp for the night. This is the perfect spot for your compressed sleeping bag, sleeping pad, and any extra clothes you’re packing just for camp or sleeping.
Putting these lighter, but space-hogging, items at the base creates a stable foundation for the heavier stuff you'll pack on top. It effectively fills out the pack without dragging your center of gravity down—a mistake that forces you to lean forward and puts a ton of strain on your back and shoulders.
This is it. The most critical area for getting your pack to feel right. The core zone is the section right in the middle of your pack, the part that rests directly against your spine between your shoulder blades. Think of it as prime real estate for your heaviest and densest gear.
Here’s what you should always try to pack in the core zone:
Placing your heavy hitters here aligns the pack's center of gravity with your own. This is how you stay balanced and feel agile on the trail, instead of feeling top-heavy or like the pack is constantly trying to pull you backward.
This simple graphic really helps visualize how to place your gear.
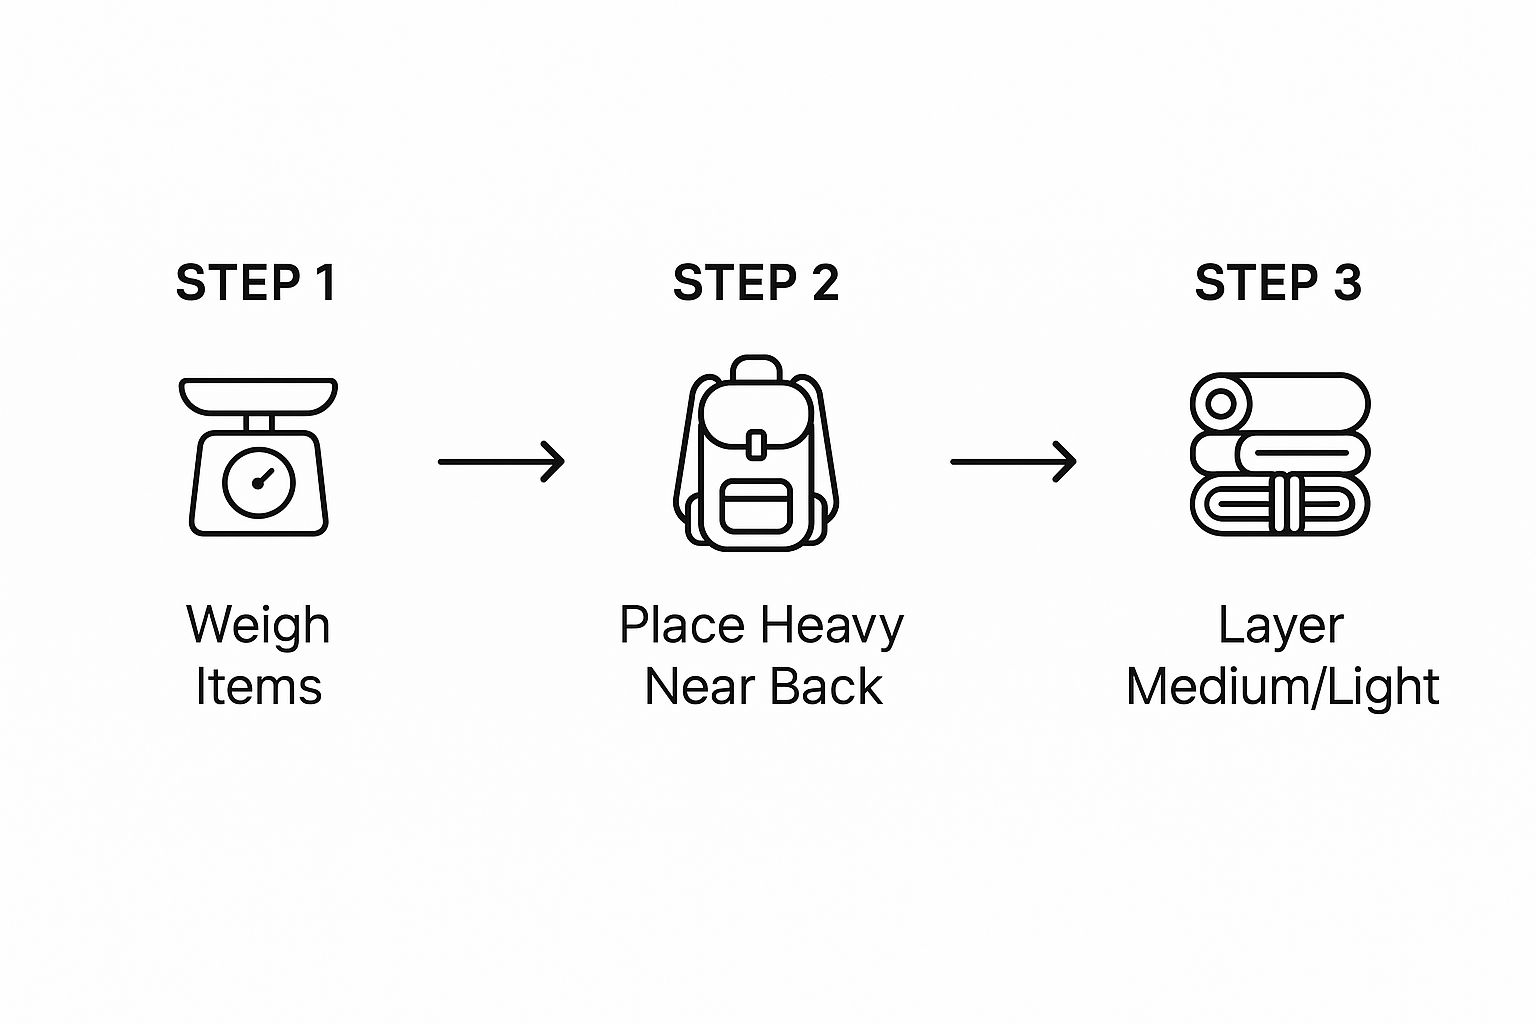
The process is straightforward: place the heaviest gear close to your back first, then layer the medium and lighter gear around it to fill the space.
Finally, we have the top zone. This includes the upper portion of the main compartment and the pack's "brain" or lid. This area is all about the essentials you need to grab quickly without tearing your entire pack apart.
Think about things like your rain jacket, trail snacks, map, compass, and first-aid kit. Keeping these items accessible means you can react to a sudden downpour or grab a quick bite without a major, pack-exploding stop.
Pro Tip: Don't overload the top lid. It’s tempting to stuff it full, but putting heavy items in the brain will make the pack feel wobbly and top-heavy. Reserve it for lightweight, truly critical gear.
This systematic approach isn't just trail folklore; it's foundational. Modern pack design, with features like padded hip belts and load lifter straps, is engineered specifically to shift 60-80% of the total weight from your shoulders down to your powerful hip muscles. Packing this way lets the technology do its job.
If you want an even deeper dive into a complete packing checklist, you can also check out our comprehensive guide on how to pack a backpack for hiking.

Photo by Chewool Kim on Unsplash
Getting your heavy gear positioned correctly is the secret sauce to feeling nimble on the trail. It's the difference between being agile and feeling like a turtle hauling its house around. Everyone knows the golden rule is to keep heavy stuff close to your spine, but there's a bit more nuance that separates a decent pack job from a great one.
Where you place that weight vertically is where the real magic happens.
For most of your hiking on flat or rolling terrain, you’ll want your heaviest items—think your food bag, cook set, and water supply—centered against your back, right between your shoulder blades. This lines up the pack’s center of gravity with your own, which is key for good posture and solid balance.
But the moment the trail points steeply uphill, the game changes. On those long, grinding climbs, shifting that heavy gear a little higher in your pack can be a total game-changer. This small adjustment pulls your shoulders forward just enough to work with your natural forward lean, keeping you from having to hunch over to fight the weight.
Knowing where to put heavy gear is one thing. Making it work with lumpy, awkward items is another challenge entirely. Two of the usual suspects are bear canisters and full hydration reservoirs.
A full bear canister is basically a small, dense boulder. It must live in that core zone, snug against your back. To keep it from shifting around and throwing you off balance, you need to pack softer items like a puffy jacket or spare clothes tightly around it. This creates a buffer that locks it in place, so it won’t wobble with every step.
A hydration bladder is a similar story. It sits perfectly in its dedicated sleeve, but it can bulge and sag as you drink from it, changing the dynamics of your pack on the fly.
Expert Tip: Before you close up your pack, yank on those compression straps. Get everything cinched down tight. A well-compressed load moves as a single unit with your body, which is absolutely fundamental for maintaining balance and saving energy.
Learning to adapt your load on the fly is a skill that really comes with trail miles. The "perfect" pack setup isn't a one-size-fits-all solution; you have to think about the terrain you'll be covering.
Ultimately, mastering heavy gear placement is all about creating a stable, predictable load. You want it to feel like an extension of your own body, not some awful burden you're stuck carrying.
Even the most meticulously packed bag can feel completely wrong after just 20 minutes on the trail. Your gear settles, your body warms up, and what felt perfect in your living room suddenly starts to pinch and pull in all the wrong places.
This is where the real skill comes in. On-trail micro-adjustments are what separate a comfortable, enjoyable trek from a day of pure misery.
Think of the first 15 minutes of any hike as your “dial-in” period. This is your chance to fine-tune the fit and make sure the load sits exactly right for the long haul. It’s a process, but getting it right from the start makes a world of difference.
The goal isn't new; it's the cornerstone of good pack design. In fact, military studies from as far back as the mid-20th century found that getting the majority of the weight onto the hips was absolutely critical for preventing injury and fatigue. Their data showed that aiming to carry about 70% of the pack's weight on the hips dramatically cut down on shoulder and back strain.
To get that weight transfer right, you have to adjust your straps in the proper sequence. Always start with every strap completely loose.
The Golden Rule: Your hips carry the load; your shoulders stabilize it. If your shoulders are screaming, it's a dead giveaway that your hip belt is either too loose or riding in the wrong spot.
As you hike, things shift. You get tired, the terrain changes, and your pack will start to feel different. A strong core is your best defense against fatigue, and if you find yourself getting tired faster than you'd like, our guide on how to get in shape for hiking has some fantastic training advice.
Here’s how to fix common problems as they pop up on the trail:
These small, constant tweaks are what seasoned hikers do without even thinking. Mastering them ensures your pack feels like an extension of your body, letting you focus on the incredible views instead of your aching back.
We’ve all been there. That nagging pull on your shoulders, the awkward wobble with every step. You think you’ve packed everything perfectly, but your body is telling you something is off.
More often than not, it's a simple packing mistake. The good news? These common slip-ups are surprisingly easy to spot and even easier to fix once you know what to look for.

Let's break down the biggest culprits I see out on the trail and how you can self-correct your pack to work for you, not against you.
This is probably the most common mistake I see. It happens when you stuff dense, heavy things—like your entire cook set or a full bear canister—right into the top section or lid of your pack. It might seem convenient, but the result is a pack that feels like it’s actively trying to throw you off balance.
This high center of gravity creates a constant, energy-sapping wobble. On tricky, uneven terrain, that's not just annoying; it's downright dangerous.
The Fix: Think of the top of your pack as your quick-access pocket for light stuff. This is where your rain jacket, fleece, or first-aid kit should live. Shove all that heavy, dense gear down into the core of your pack, right up against your spine between your shoulder blades. The difference in stability is immediate and incredible.
On the flip side, you have the low-riding sag. This is what happens when you put your heaviest gear at the very bottom of your pack. It feels logical, right? Build a solid foundation. But in reality, this creates a low center of gravity that yanks you backward and down.
You'll find yourself leaning way too far forward to compensate, which puts a ton of strain on your lower back and shoulders. A sagging pack honestly feels like you're dragging an anchor all day long.
The Fix: This goes back to knowing your packing zones. The bottom of your pack is for bulky but light items like your sleeping bag. It creates a stable base that doesn't drag. Your heavyweights must be elevated to that core zone, centered against your back.
Key Takeaway: The "pendulum effect" is your enemy. Anything you dangle from the outside of your pack—water bottles, camp shoes, a wet towel—creates a swinging weight that pulls on you with every step. It throws off your rhythm and wastes a surprising amount of energy.
So you’ve placed every piece of gear perfectly. Great! But if you don't cinch down your pack's compression straps, all that careful work goes out the window the second you hit the trail.
An uncompressed load is a shifting load. As you hike, gravity will pull everything downward, creating a lumpy, sagging mess at the bottom of your pack. You've just undone all your hard work.
The Fix: Make this the very last step before you shoulder your pack. Tighten every single compression strap—the ones on the sides, the top lid, and even the bottom if you have them. Your goal is to squish everything into a single, solid block that doesn't move. You'll be amazed at how much more stable a tight, compressed pack feels on your back.
Even when you feel like you've mastered the art of packing a backpack, a few tricky questions always seem to pop up. Just when you think you have it all figured out, these common dilemmas can be the difference between a pack that feels like an extension of your body and one that just feels… off.
Let's dive into some of the most frequent packing puzzles I see people struggle with. Getting these right will help you fine-tune your load for incredible comfort and stability on the trail.
This is a huge one, and where you carry your water can make or break your balance.
Hands down, a hydration reservoir is the best choice for perfect weight distribution. When you slip it into its dedicated sleeve, it keeps 2-3 liters (that's 4.4-6.6 pounds!) of sloshing weight centered, stable, and right up against your spine where it belongs.
If you're a bottle person, that's okay, but balance is everything. Whatever you do, don't carry a single, large bottle in one side pocket. That lopsided weight will throw you off, forcing one side of your body to constantly overcompensate. Trust me, your muscles will be screaming by the end of a long day.
The fix is simple: use two smaller bottles and stick one in each side pocket. This keeps your load symmetrical and gets rid of that awkward, one-sided pull.
Ah, the bear canister. It’s a classic packing nightmare—dense, heavy, and shaped like a barrel. Thankfully, there’s really only one right place for it: smack in the core of your pack. It needs to be positioned vertically and pressed as close to your back as possible.
Don't even think about putting it at the very top or bottom. Too low, and it creates a horrible pendulum effect that pulls you backward. Too high, and you'll feel dangerously wobbly with every step.
Pro Tip: Your secret weapon here is soft gear. I always pack my puffy jacket, rain shell, or spare clothes tightly around the canister. This fills all the dead space, locking it firmly in place so it can't shift or knock around while you're hiking.
It absolutely does, but you've got a few good options depending on your specific tent and pack.
The gold standard for weight distribution is to pack the tent body inside your pack. You can either stuff it in the bottom compartment with your sleeping bag or compress it into the main compartment. Then, you can slide the poles vertically inside the pack along the back panel or secure them tightly in an exterior side pocket.
If you absolutely have to carry the tent on the outside, avoid strapping it to the very top or bottom like a log. A tent on the bottom is a magnet for rocks and roots, and one on top will make you feel incredibly top-heavy. The most stable way to carry it externally is often vertically in a large side pocket, balanced by a water bottle or other gear on the opposite side.
The core principles don't change—heavy stuff close to your spine, bulky gear at the bottom—but winter backpacking definitely shifts your priorities. Winter gear is heavier and much bulkier, plus immediate access to safety equipment becomes non-negotiable.
You need to get to your critical safety tools in a hurry. This is one of the few times that gear like an avalanche shovel and probe gets a pass on the "no external gear" rule. In fact, most winter-specific backpacks are designed with dedicated external pockets or sleeves for exactly this reason. This setup allows you to grab them instantly without compromising your pack's overall balance too much.
Ready to upgrade your adventure with gear that’s as smart as your packing strategy? TREKOLOGY designs lightweight, comfortable, and durable equipment to make every trip better. Explore our full range of thoughtfully engineered gear at https://trekology.com and feel the difference on your next hike.
Leave a comment