Certified Business
With over 10,000 orders
With over 10,000 orders

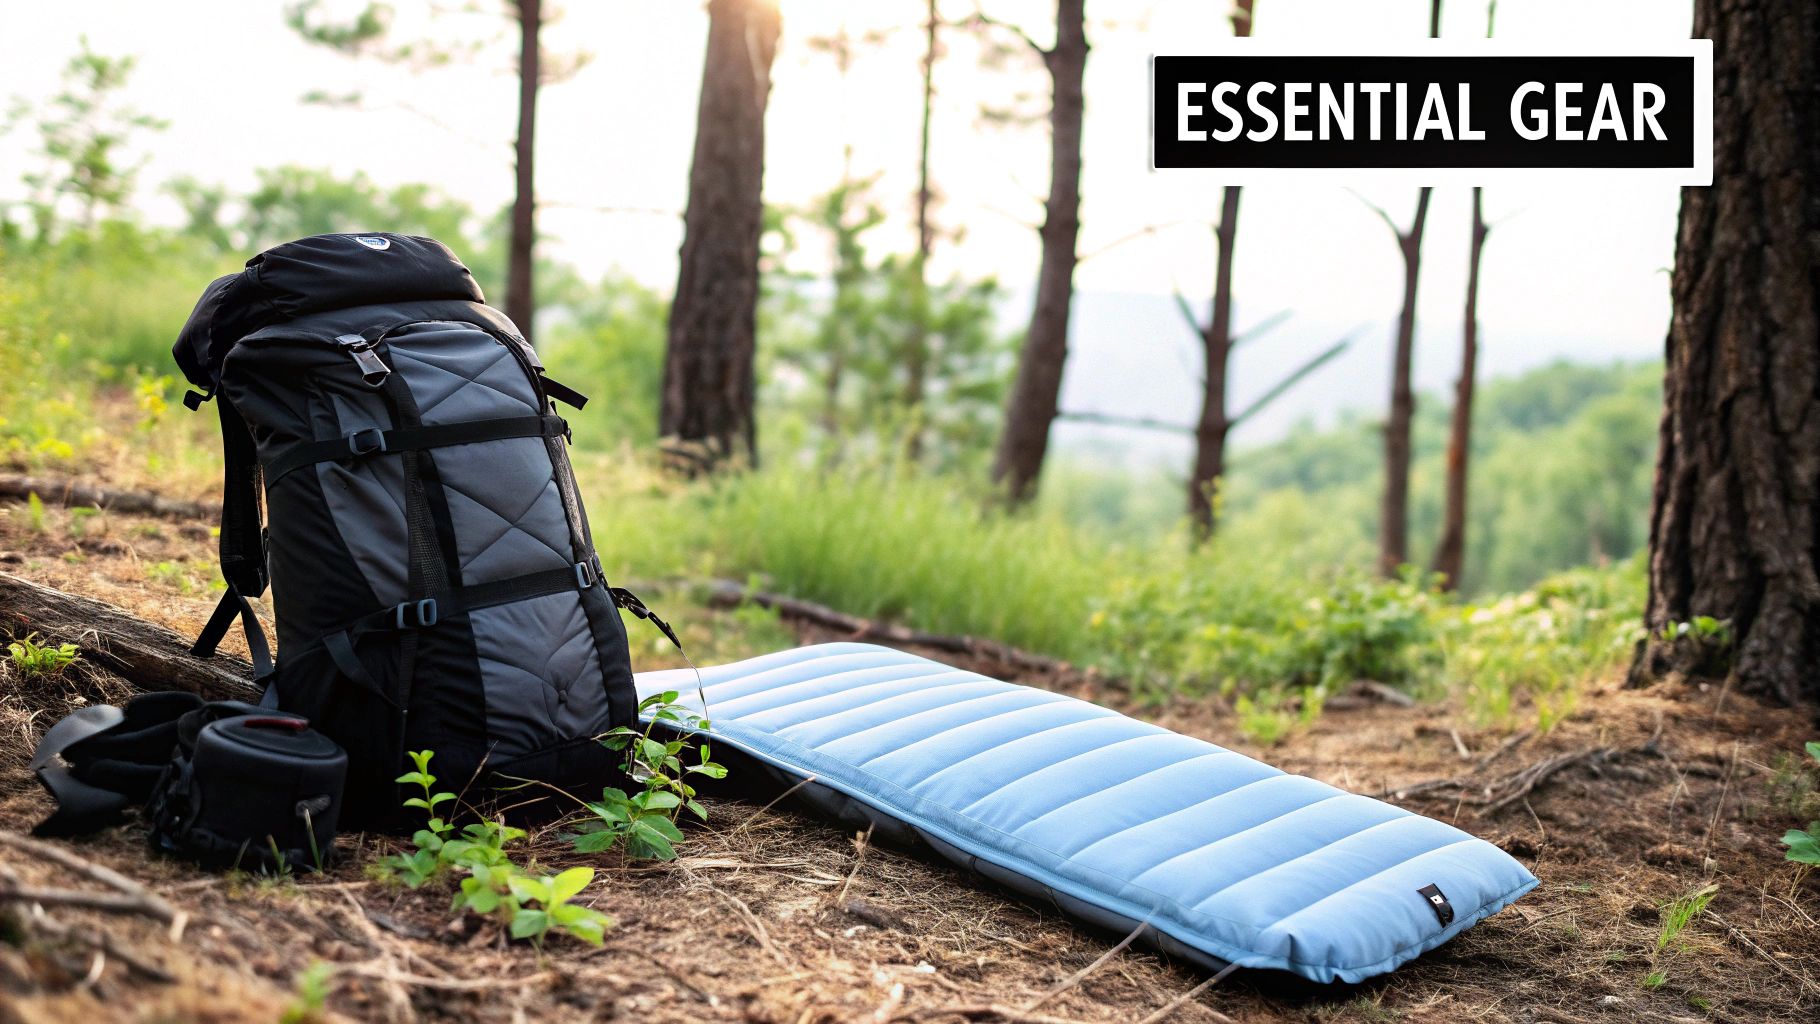
I’ll never forget it. Tossing and turning, shivering uncontrollably on a night that wasn’t even that cold. My fancy new sleeping bag wasn't the problem—my flimsy, cheap sleeping pad was. That restless night wasn't just uncomfortable; it was a total gear failure.
A backpacking sleeping pad is so much more than a cushion. It's a non-negotiable survival tool that delivers the insulation and comfort you need for the restorative sleep that powers you down the trail. This guide is going to make you an expert on this cornerstone piece of gear.
So many backpackers, especially when starting out, get obsessed with shaving grams off their tent or chasing the lowest temperature rating on a sleeping bag. The sleeping pad often gets treated like an afterthought. I’m telling you from experience: this is a huge mistake.
Your sleeping bag keeps you warm by trapping air in its insulation (whether that's down or synthetic). But the moment you lie down, your body weight crushes that loft, making it practically useless against the cold ground beneath you.
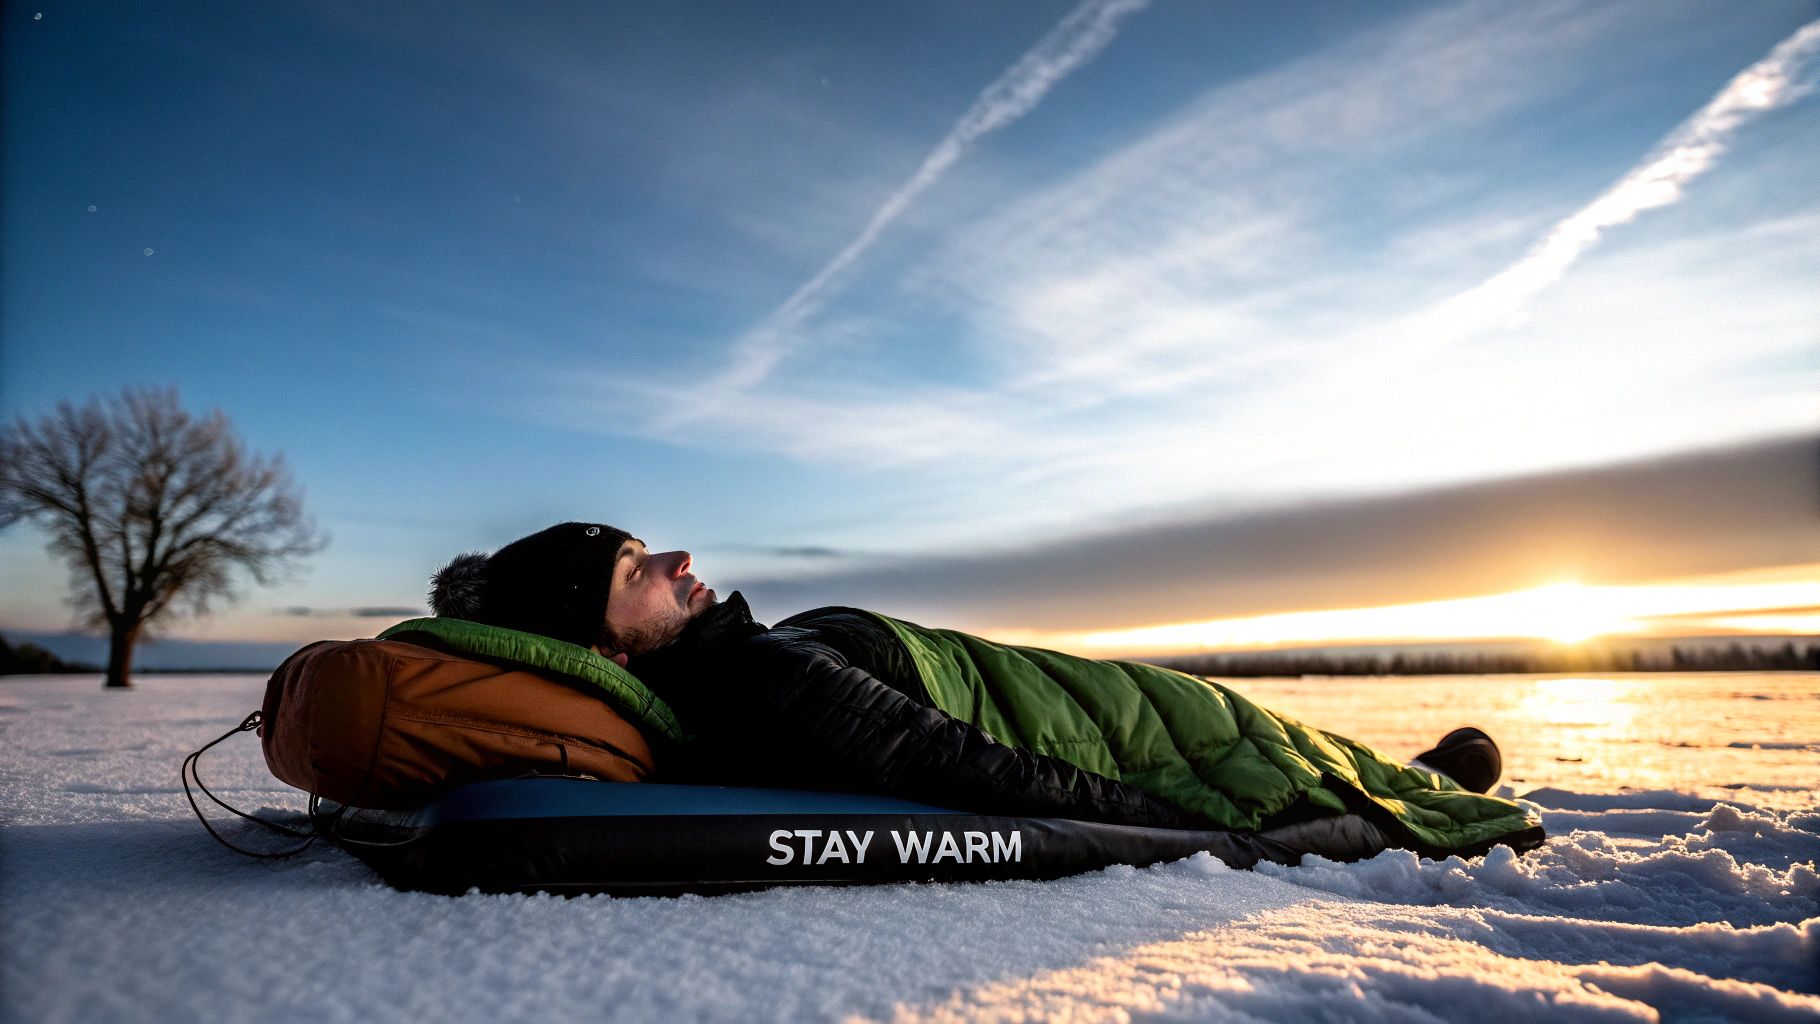
This is where your sleeping pad saves the day. It has two critical jobs, and surprisingly, comfort isn't number one. Its primary purpose is insulation. It creates a vital barrier that stops the cold ground from sucking the warmth right out of your body through a process called conduction. Without that barrier, even a 0°F sleeping bag won't keep you from shivering all night.
Once the insulation job is handled, a good pad provides the comfort you need for deep, restorative sleep. A night spent shifting around on hard, lumpy ground will leave you stiff, sore, and exhausted. That directly impacts how you feel and perform the next day. Quality sleep is when your muscles actually repair themselves and your mind recharges for another big day of hiking.
Think of your sleep system as a three-legged stool: the sleeping bag, your shelter, and the sleeping pad. If any one of those legs gives out—especially the pad—the whole system collapses. You’re left cold, miserable, and drained.
This guide will help you see your sleeping pad not as a luxury, but as a core piece of performance equipment. We'll dig into everything that matters:
By the time we're done, you'll understand why picking the right backpacking sleeping pad isn't just about getting a good night's sleep—it's about your safety, energy, and having a much better time in the backcountry.
When you're comparing backpacking sleeping pads, you’ll see one number pop up again and again: the R-value. This isn't just some technical spec for gearheads; it's the single most important metric telling you how well a pad will insulate you from the cold, hard ground.
Think of it like the insulation in your house. A higher R-value means more resistance to heat flow. On the trail, your body is the furnace, and the ground is constantly trying to suck away your warmth through conduction. A pad with a beefier R-value is simply a better barrier, keeping that precious heat where it belongs—with you.
Here’s a classic mistake many backpackers make: assuming a warm, puffy sleeping bag is all they need. The problem is, as soon as you lie down, your body weight crushes the insulation (whether it's down or synthetic) beneath you, making it almost useless.
This is where your sleeping pad steps in. It provides the critical thermal break between your body and the ground. Without the right pad, even a 0°F sleeping bag won't keep you warm if the ground is cold enough. Understanding R-value isn't just about comfort; it's about the thermal performance of your entire sleep system.
For years, trying to compare warmth between different pad brands was a total guessing game. Every company had its own testing methods, so you were never really comparing apples to apples.
Thankfully, that chaos ended with the introduction of the ASTM F3340-18 standard. This is a standardized, third-party lab test that measures a pad’s thermal resistance in a controlled environment. Now, an R-value of 4.5 from one brand means the exact same thing as an R-value of 4.5 from another. Finally, a level playing field.
The ASTM standard was a game-changer. It forced brands to compete on proven performance, not just marketing hype, and gave us a reliable way to make informed choices.
This push for reliable gear is part of a bigger picture. The backpacking sleeping pad market is expected to be worth around $500 million globally in 2025, growing at a steady clip of about 7% each year. More people are getting outside and realizing that a good night's sleep is non-negotiable. You can dig into more market insights on backpacking gear trends and their financial impact if you're curious.
This chart breaks down the average R-value and weight you can expect from the three main types of sleeping pads.
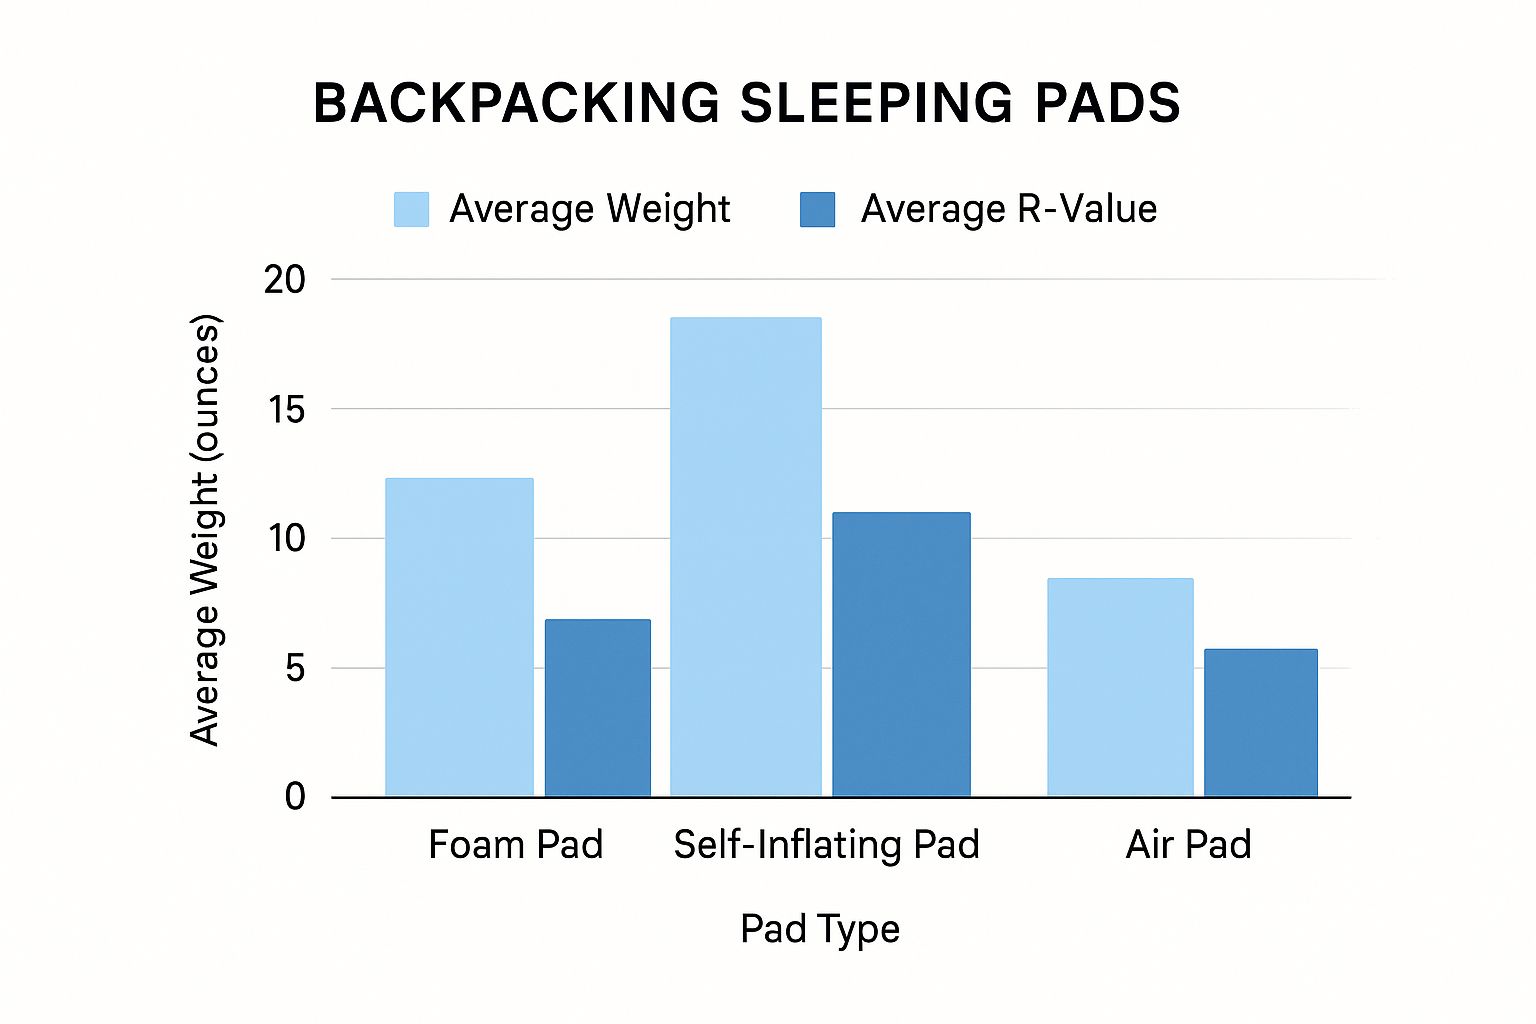
As you can see, there's a clear trade-off. Air pads tend to give you the most insulation for the least weight, while foam pads offer bombproof reliability with a bit less warmth for a similar weight.
So, how much R-value do you actually need? The honest answer is: it depends. Your ideal number hinges on the season, the typical ground temperatures you’ll face, and your own body. Some of us just sleep colder than others. A higher R-value is always warmer, but it usually means more weight, a bigger packed size, and a higher price tag.
To get you started, here’s a practical guide for matching R-values to conditions. If you know you're a cold sleeper, it's always smart to bump up to the next level of warmth.
This simple table connects R-values to the seasons and temperatures you're likely to encounter. Use it as a starting point to narrow down your options.
| R-Value Range | Best Use (Seasonal) | Typical Ground Temperature |
|---|---|---|
| 1.0 - 2.0 | Warm Summer | 50°F (10°C) and above |
| 2.0 - 4.0 | 3-Season Backpacking | 32°F to 50°F (0°C to 10°C) |
| 4.0 - 6.0 | All-Season / Early Winter | 15°F to 32°F (-9°C to 0°C) |
| 6.0+ | Deep Winter / Snow Camping | 15°F (-9°C) and below |
Picking a pad with the right insulation is the first step toward avoiding a miserable, shivery night. It’s what will keep you warm, rested, and ready to tackle whatever the trail throws at you the next day.
When you're choosing a backpacking sleeping pad, your first big decision comes down to three fundamental designs. Each one strikes a different balance between comfort, weight, packability, and durability. There’s really no single "best" pad out there—the right one for you is the one that lines up with your personal priorities on the trail.
Let's dive into the big three: air pads, self-inflating pads, and closed-cell foam pads. We'll look at how they work, who they’re built for, and the trade-offs you'll be making with each.
For a huge number of backpackers today, air pads are the go-to choice, and it's easy to see why. At their core, they are lightweight, inflatable mattresses that rely completely on air for support. When you let the air out, they pack down to an almost unbelievable size, often no bigger than a Nalgene bottle.
The main draw here is simply unparalleled comfort. With some models inflating to three or four inches thick, they put a massive cushion between you and any poky roots or rocks underneath. This is a game-changer for side sleepers, who need that extra give for their hips and shoulders to sink into. Many top-tier air pads also come with impressive R-values, using clever internal baffles and reflective films to trap heat without adding a bunch of heavy insulation.
Of course, there’s a catch: vulnerability to punctures. All it takes is one sharp rock or an unseen thorn to turn your comfy bed into a useless, flat piece of fabric in the middle of the night. You absolutely have to carry a patch kit and be smart about where you set up camp.
For most of us, though, the comfort-to-weight ratio of a good air pad is just too good to pass up. The industry has definitely noticed, with a huge push toward thicker, warmer, and more stable air pads that barely move the needle on the scale.
This trend is backed by some serious numbers. The global market for these pads was valued at around USD 1.2 billion in 2023 and is on track to hit nearly USD 2.3 billion by 2032. That explosion shows just how much we backpackers want gear that’s light, comfortable, and easy to stuff in a pack. You can dig deeper into the growth of the inflatable sleeping pad market if you're curious about the data.
Think of self-inflating pads as the hybrid option, blending an open-cell foam core with an airtight fabric shell. When you unroll the pad and open the valve, the foam naturally expands, sucking air in with it. All you have to do is top it off with a few breaths to get it to the perfect firmness.
This design hits a fantastic middle ground. They’re tougher and more puncture-resistant than most air pads, and that foam core means you’ll still have some insulation even if you do get a small leak. That built-in backup makes them a super reliable choice for remote trips where gear failure is simply not an option.
The trade-off? Weight and bulk. That foam adds ounces and means they just don't pack down as small as an air pad. And while they’re certainly comfier than a basic foam pad, they usually can't match the plush, deep cushioning of a high-end air pad.
I like to think of self-inflating pads as the trusty station wagon of the sleeping pad world. They aren't the lightest or the flashiest, but they are incredibly dependable, practical, and just get the job done in almost any situation.
This is the old-school, original backpacking pad, and it’s still the top choice for ultralight purists, thru-hikers, and anyone who puts absolute reliability above all else. Made from a dense foam filled with tiny sealed air bubbles, these pads are, for all practical purposes, indestructible.
Their biggest advantage is their bombproof durability. You can toss a foam pad on sharp granite, spiky pinecones, or desert scrub without a single worry. There's nothing to inflate, so there's absolutely nothing to pop. They are also ridiculously lightweight.
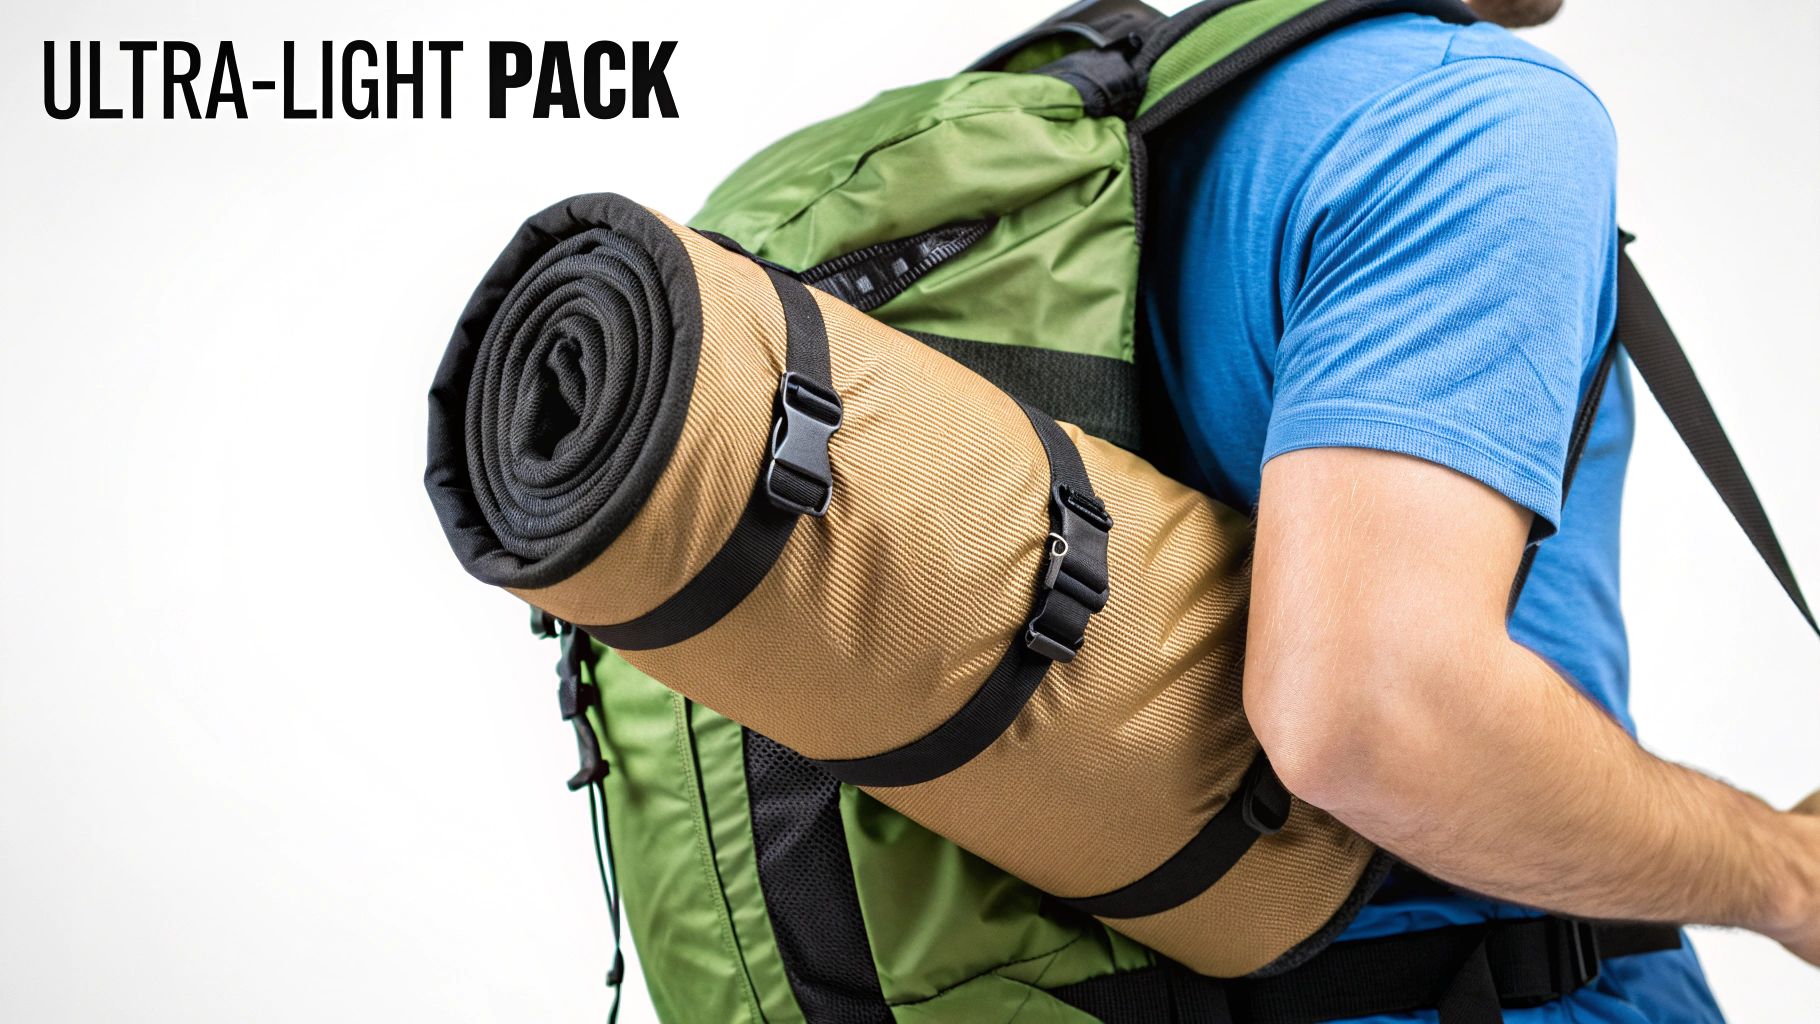
But the downsides are real. Closed-cell foam pads are the least comfortable of the bunch, usually measuring less than an inch thick. They’re also super bulky; you’ll almost always see them strapped to the outside of a backpack. And while they're tough as nails, their R-value is generally lower than what you'd get from an insulated air pad or self-inflater.
Still, that dead-simple design is also a feature. They make a fantastic sit pad for breaks or a protective layer to put under your air pad for extra warmth in the winter. For the hiker who can sleep on anything and obsesses over weight and reliability, the classic foam pad is a perfect fit.
Every single piece of gear you stuff into your pack represents a compromise. It’s a truth every backpacker learns, often the hard way. But nowhere is this balancing act more apparent than with your backpacking sleeping pad.
Choosing the right one is like a personality test. It forces you to get honest and answer a simple but crucial question: what do you really value on the trail? This is the eternal backpacking debate—a constant tug-of-war between carry weight, sleeping comfort, and how small your gear packs down.
There’s no single “best” pad out there. Your perfect pad exists, but finding it means figuring out your personal hiking style first.
To get a clearer picture, let's look at two classic types of backpackers. See which one sounds more like you.
The Ultralight Thru-Hiker: This hiker lives and breathes by their gear spreadsheet. Every gram is scrutinized, and their base weight is a badge of honor. For them, a sub-1-pound pad isn't just nice to have; it's a non-negotiable part of the system. They’ll happily give up a few inches of plush cushioning if it means a lighter pack, letting them crush more miles with less effort. This is the person choosing a minimalist foam pad or a short-length air pad, often sticking their empty pack under their feet for extra insulation.
The Weekend Warrior: This backpacker's goal is to escape the 9-to-5 and squeeze every last drop of enjoyment out of their trip. A good night's sleep isn't a luxury—it's the whole point. They are more than willing to carry an extra half-pound if it guarantees they'll wake up refreshed and without sore hips. You'll almost always find this hiker with a thick, insulated air pad, probably in a wide or long size for maximum creature comfort.
Figuring out which camp you fall into is the first real step. One person's essential comfort is another's dead weight.
The numbers on a spec sheet only tell part of the story. A pad’s physical shape and dimensions have a massive impact on both how it feels in your pack and how you feel in the morning.
The struggle to pick a sleeping pad is a perfect snapshot of the entire outdoor gear world. It’s a constant search for that sweet spot between performance and practicality, a quest that’s fueling a huge amount of innovation.
This drive for better gear is easy to see in the market itself. The global outdoor camping sleeping pads market was valued at US $1.5 billion in 2025 and is on track to hit nearly $2.5 billion by 2033. That growth points to a massive global shift toward getting outdoors and an appreciation for quality equipment that makes it more enjoyable. You can dig into these market trends on Data Insights Market.
Let's put this into practice and compare two classic options.
A closed-cell foam pad might weigh only 14 ounces, but it’s incredibly bulky—you’re definitely strapping that thing to the outside of your pack. On the other hand, a top-tier insulated air pad could weigh the exact same 14 ounces but pack down to the size of a Nalgene bottle, sliding easily inside your pack.
But wait, there's more. The foam pad is basically indestructible. The air pad? You'd better be careful where you lay it down and always carry a patch kit. The foam pad offers minimal cushion, while the air pad can give you three inches of glorious loft.
So, which is better? The only person who can answer that is you. It all comes down to where you choose to strike your own balance.
Once you’ve got the basics like R-value and pad type sorted out, it's time to dive into the details. These are the little things that don't always jump off the spec sheet but make a massive difference in how well you actually sleep out there.
Honestly, learning to spot these smart design choices is what separates a decent gear purchase from a truly great one. A well-designed valve or a quiet fabric can turn a frustrating camp chore into a smooth part of your routine, letting you focus on the sunset instead of your gear.
Think of the valve as the gateway to your sleeping pad. It's in charge of how easily air gets in and, more importantly, how securely it stays there all night long. Older pads often had finicky twist-and-pull valves that were slow and a pain to use. Thankfully, modern pads have come a long way.
Today, you should really look for a pad with a flat valve system. These are low-profile, tough, and usually have a brilliant two-part design: a one-way valve for inflation and a separate, wide-open valve for deflation. This makes setting up and packing away remarkably quick and painless.
The real game-changer here is the pump sack. This is a super lightweight bag that attaches to the inflation valve. You just scoop air into the sack, roll the top down, and squeeze the air into your pad. It's not just about saving your breath at altitude; it’s about protecting your investment.
When you blow up a pad with your lungs, you're forcing moisture and bacteria inside. Over time, this can lead to nasty mold growth and can actually degrade the insulation. A pump sack avoids this problem completely, keeping your pad's interior dry and helping it last for years. To see how all these features work together, check out this ultimate buying guide for sleeping pads for a more in-depth look.
The internal structure of an air pad, what we call its baffles, is what determines how stable and comfortable it feels. This is the secret sauce that prevents that wobbly, "pool float" sensation you get from poorly designed pads.
Baffles are just the welded seams inside the pad that create different air chambers. How they're designed and oriented controls how your weight is distributed.
A pad with a well-engineered baffle system will feel supportive and solid, even when you toss and turn. It gives you a stable platform to sleep on, so you can fully relax without feeling like you're on a waterbed.
Finally, let’s talk about the fabric. The material on the outside of your pad affects its durability, how noisy it is, and how much you slide around at night. A lot of high R-value pads use internal reflective films to boost warmth, but this is often what causes that classic "crunching a potato chip bag" sound every time you move.
Newer models are getting much better at this, using quieter materials or clever baffle designs to deaden the noise. Also, pay attention to the texture of the fabric. A slightly "grippy" finish is a small detail that makes a huge difference, as it helps keep your sleeping bag (and you) from sliding off the pad onto the cold tent floor—especially when you can't find perfectly level ground.
Think of your sleeping pad as a serious investment in your comfort on the trail. Just like any good piece of gear, a little bit of care goes a long way. If you know how to look after it—and how to handle a simple repair—your pad will be your trusty companion for countless adventures.
The single most important thing you can do for your pad happens back at home: proper storage. The absolute worst thing for it is to be left crammed in its stuff sack for months. That constant compression can crush the life out of the foam in self-inflating models and permanently damage the delicate internal structures of an air pad.
The best way to store your pad is to leave it unrolled, partially inflated, with the valve open. This lets the insulation stay fluffy and, just as importantly, allows any moisture from your breath to evaporate instead of turning into a science experiment. Just slide it under your bed or stand it up in the back of a closet.
Cleaning is simple but crucial. After a trip, the surface is covered in a mix of dirt, sweat, and body oils, which can slowly break down the fabric.
A well-cared-for sleeping pad is a reliable one. Proactive maintenance like proper storage and cleaning is the best way to prevent gear failure when you're miles from the trailhead.
For a deeper dive, you can learn more about cleaning, repairing, and storing your sleeping pad in this detailed guide from our friends at Trekology.
That slow, demoralizing hiss in the middle of a cold night is a sound every backpacker dreads. But it doesn't have to ruin your trip! Patching a pinhole leak is a fundamental backcountry skill, and it’s easier than you think. Always, always carry the small patch kit that came with your pad.
Even after you've wrapped your head around R-values and pad types, a few practical questions always seem to pop up right before a trip. Let's tackle some of the most common ones we hear from backpackers to clear up any lingering confusion and get you out on the trail with confidence.
In a word: no. A yoga mat is great for a temperature-controlled studio floor, where its main job is to provide grip and a little cushion. It offers virtually zero insulation (R-value), meaning it won't stop the cold ground from sucking the warmth right out of you.
On anything but the warmest summer nights, you’d be miserably cold. Not to mention, you'd feel every single rock, root, and pebble under your tent. A backpacking sleeping pad is a purpose-built piece of survival gear, engineered first for insulation and second for comfort—two jobs a yoga mat just can't handle in the wild.
Ah, the midnight slide. It's a classic problem, especially when that perfectly flat campsite proves to be a myth. The first line of defense is always good site selection, so take an extra minute to find the flattest ground you can. If you still find yourself slipping, here are a few tricks that actually work.
This really comes down to how you sleep. If you’re a side sleeper or someone who tosses and turns, a wider pad (usually 25 inches) can be an absolute game-changer. It keeps your arms and knees from flopping off onto the cold, hard ground, which is a surefire way to wake yourself up.
For many active sleepers, the few extra ounces are a tiny price to pay for a night of deep, uninterrupted rest. On the other hand, if you're a still sleeper who stays on your back, a standard-width or tapered mummy pad will probably feel just fine while saving you precious weight.
That "potato chip bag" sound you hear is usually caused by the reflective thermal films layered inside the pad. These high-tech films are fantastic at reflecting your body heat back at you, which boosts the R-value significantly without adding heavy, bulky insulation. The trade-off is that the material itself can be noisy.
Manufacturers are always experimenting with quieter materials and new baffle structures to minimize the crinkle. For those gearing up for chilly adventures, knowing how to layer your gear is key; our Trekology guide has some great winter backpacking tips for beginners that go hand-in-hand with choosing a warm pad. Before you buy, it’s always a good idea to check recent user reviews, as hikers are usually brutally honest about a pad's real-world crinkle-factor.
At Trekology, we believe that quality sleep is the foundation of every great outdoor adventure. From our ultralight inflatable pillows to our durable, comfortable sleeping pads, all our gear is engineered to help you rest better so you can explore further. Discover the perfect sleep system for your next trip at https://trekology.com.
Leave a comment