Certified Business
With over 10,000 orders
With over 10,000 orders

Photo by Tyrex Scand on Unsplash
Figuring out your bathroom situation can make or break a camping trip. The options run the gamut, from a simple bucket with a lid to some pretty slick flushing or composting toilets. What's right for you really boils down to your style of camping, how many people you've got with you, and frankly, how much comfort you want out in the wild.
Let's be real: figuring out where to "go" is one of the biggest mental hurdles for a lot of campers, new and old. But moving beyond the old-school "dig a hole" method is a total game-changer. It makes your whole trip more comfortable, way more private, and a lot kinder to the environment.
Having a dedicated bathroom setup isn't just a creature comfort; it's a core part of camping responsibly and comfortably. No more fumbling around in the dark for a midnight bathroom run. It’s all about creating a clean, private space that feels safe, no matter how far you are from indoor plumbing.
When you start looking, you’ll find that camping toilets generally fall into three buckets (sometimes literally). Each one is built for a different kind of camper, from the family setting up at a state park to the solo adventurer deep in the backcountry.
We'll get into the nitty-gritty of each, but just knowing these three categories is the perfect starting point. Getting your whole campsite dialed in is key, and you can find more great ideas in our guide on how to make camping more comfortable.
The best camping bathroom solution is the one that seamlessly fits your adventure style. It should reduce stress, not add to your list of chores. Think of it as an investment in your overall outdoor enjoyment.
The trick is to match the toilet’s features to your actual needs. A family with little kids will probably love the familiar feel of a flushing toilet. An overlander on a month-long journey, on the other hand, will appreciate the low-maintenance, off-grid nature of a composting toilet. Once you weigh the pros and cons, you can build a setup that makes your trip memorable for all the right reasons.
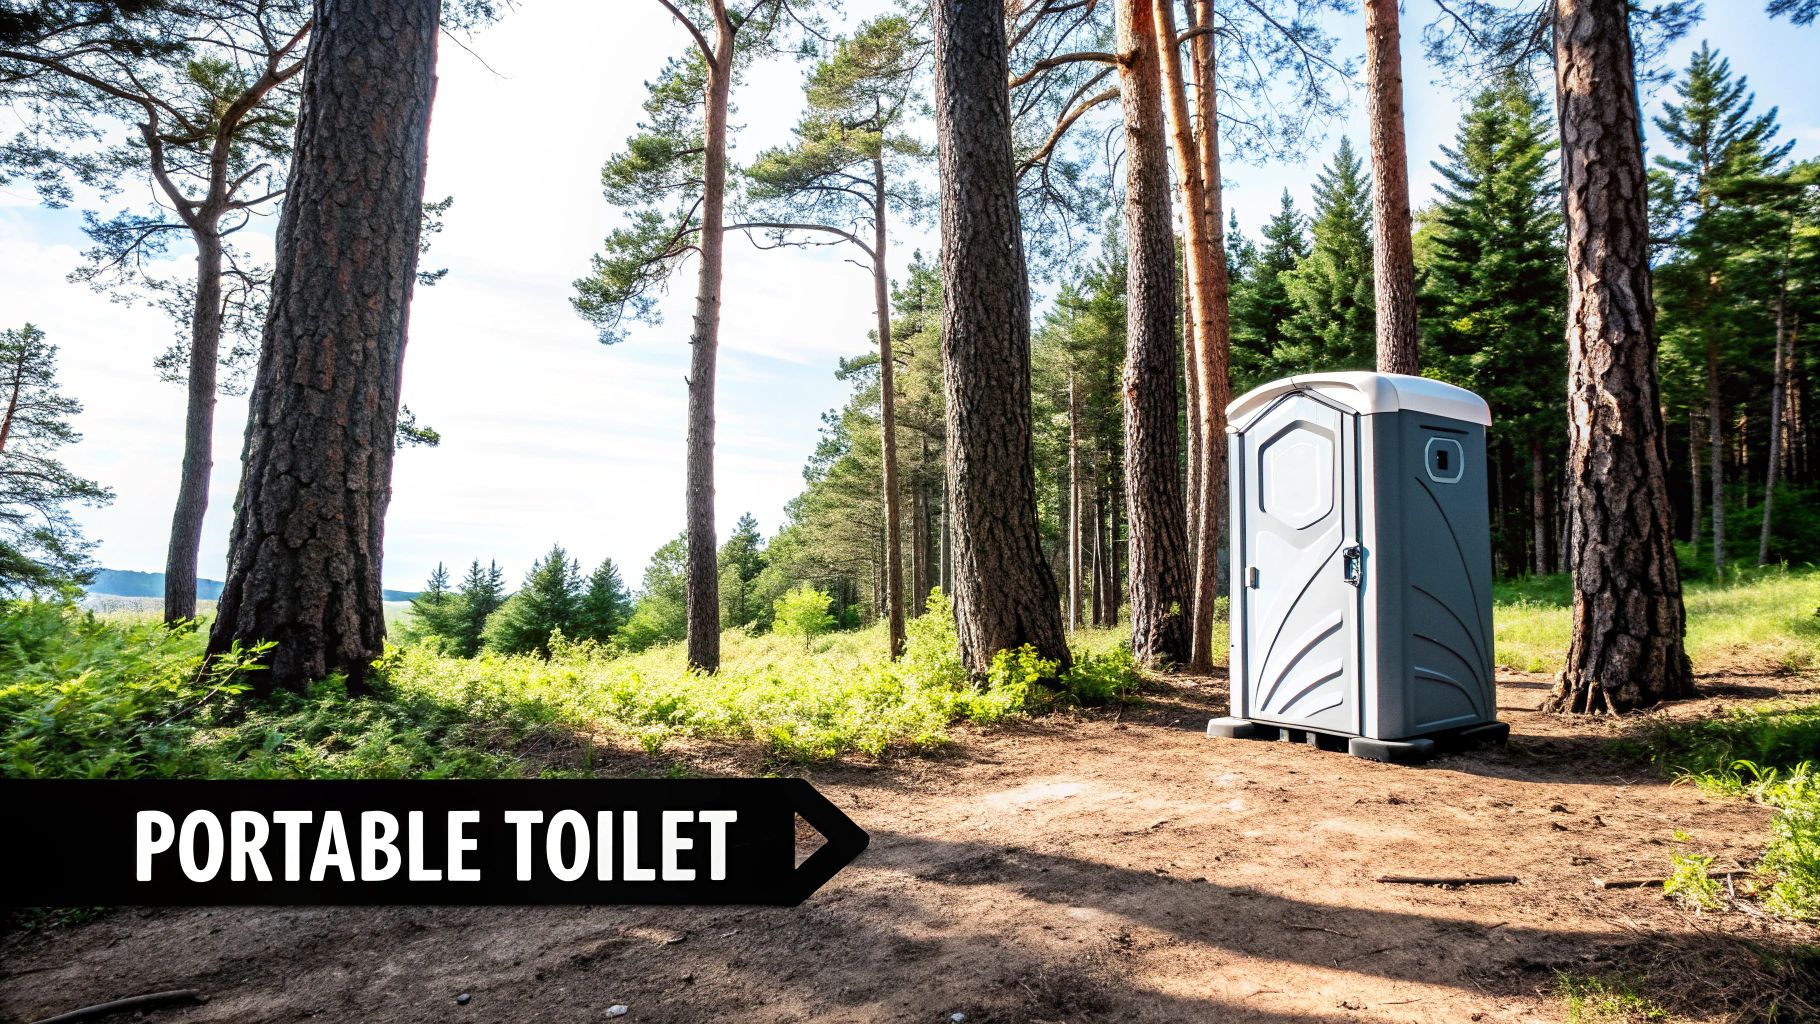
Picking out the right portable toilet is probably the single most important decision you'll make for your camp bathroom. The options have exploded in recent years, and it’s no surprise. The market for portable toilets, including the ones we take camping, is projected to jump from USD 22.69 billion to a staggering USD 51.06 billion by 2035. That's a lot of growth, and it just shows how much campers are starting to value more hygienic and convenient options in the woods.
This boom means there’s a perfect potty out there for everyone, whether you're a weekend warrior or a full-time overlander. The best choice for you really boils down to your group size, how long you'll be out, your budget, and frankly, how much maintenance you're willing to deal with. Let's dig into the three main types to figure out what fits your style.
For many campers, the bucket toilet is the first step up from digging a hole in the ground. It's the definition of simple: usually just a five-gallon bucket with a snap-on toilet seat and a lid. It’s an incredibly straightforward and budget-friendly solution.
Think of it as the rugged, no-frills workhorse of the camping world. It's tough, lightweight, and takes zero effort to set up. For car campers on a quick weekend getaway, this is often all you need. You just line it with a heavy-duty waste bag, do your thing, and then seal the bag for proper disposal later. You can find plenty of various portable toilet models out there, but the basic concept remains the same.
This is the go-to option for campers who value simplicity and a low price tag over comfort. It's ideal for short trips where you're staying in one spot and have an easy way to get rid of the waste bags.
If the idea of roughing it doesn't quite extend to the bathroom, a flushing portable toilet is a fantastic choice. These are a major upgrade in both comfort and hygiene, making them a huge hit with families and anyone camping in an RV.
These toilets look a bit more complex, featuring two separate tanks that clip together. The top tank holds fresh water for flushing, while the bottom is a sealed holding tank where all the waste goes. This two-tank system is brilliant at trapping odors and keeping everything out of sight.
A flushing portable toilet bridges the gap between roughing it and glamping. It introduces a level of civilized comfort that can make camping more approachable for beginners or families with young children.
Using one is easy. There's either a manual pump or a button that flushes water into the bowl, sweeping waste down into the sealed tank. Most people add special deodorizing chemicals to the holding tank, which helps break down waste and kill any smells. The trade-off for this convenience is the extra weight and the need to eventually empty the holding tank at an approved RV dump station.
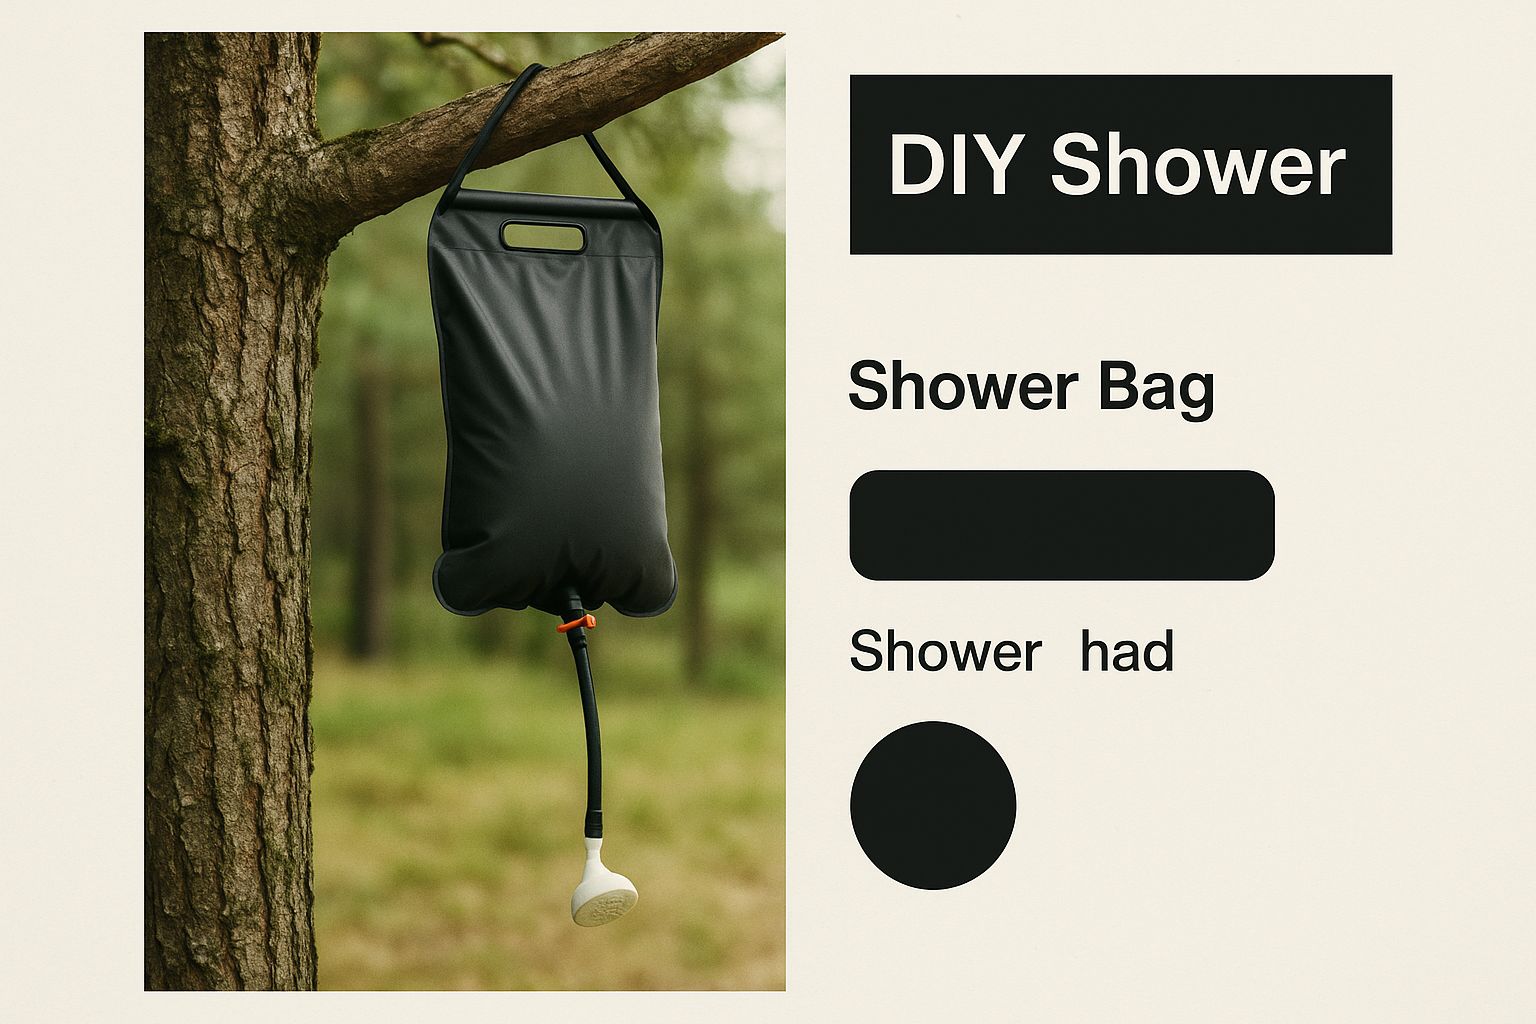
The image above gives you a sense of how even DIY solutions can be straightforward, which is the whole idea behind these self-contained systems—making life easier at the campsite.
For the most advanced and eco-friendly option, look no further than composting and waterless toilets. These are built for the long haul, perfect for overlanders, van-lifers, and anyone spending serious time off-grid without access to dump stations.
The magic behind these toilets is their ability to separate liquids from solids. This single feature is the key to a completely odor-free experience because it prevents the two from mixing and creating sewage.
This clever design means you only need to empty the solids container every few weeks—or even months—depending on how much it’s used. Since they don't rely on water or chemicals, they are a truly self-sufficient and green solution. They do come with a higher price tag and a slight learning curve, but for serious adventurers, their low maintenance and sustainable design are well worth the investment.
With all the options out there, it can be tough to know where to start. This table breaks down the three main types to help you match a toilet to your specific camping style.
| Toilet Type | Pros | Cons | Average Cost | Ideal Camping Style |
|---|---|---|---|---|
| Bucket Toilet | Inexpensive, durable, lightweight, easy to clean. | Minimal odor control, frequent bag changes needed. | $20 - $40 | Short-term car camping, budget-conscious trips. |
| Flushing Toilet | High comfort, excellent odor control, feels like home. | Heavier, requires a dump station for emptying. | $70 - $200 | Family camping, RVs, longer stays at established campsites. |
| Composting Toilet | Eco-friendly, odor-free, infrequent emptying. | High initial cost, requires carbon medium. | $900 - $1,200 | Overlanding, van life, long-term off-grid adventures. |
Ultimately, the best toilet is the one that fits your needs without adding stress to your trip. Whether it's a simple bucket or a high-tech composting unit, the right choice makes any campsite feel a little more like home.
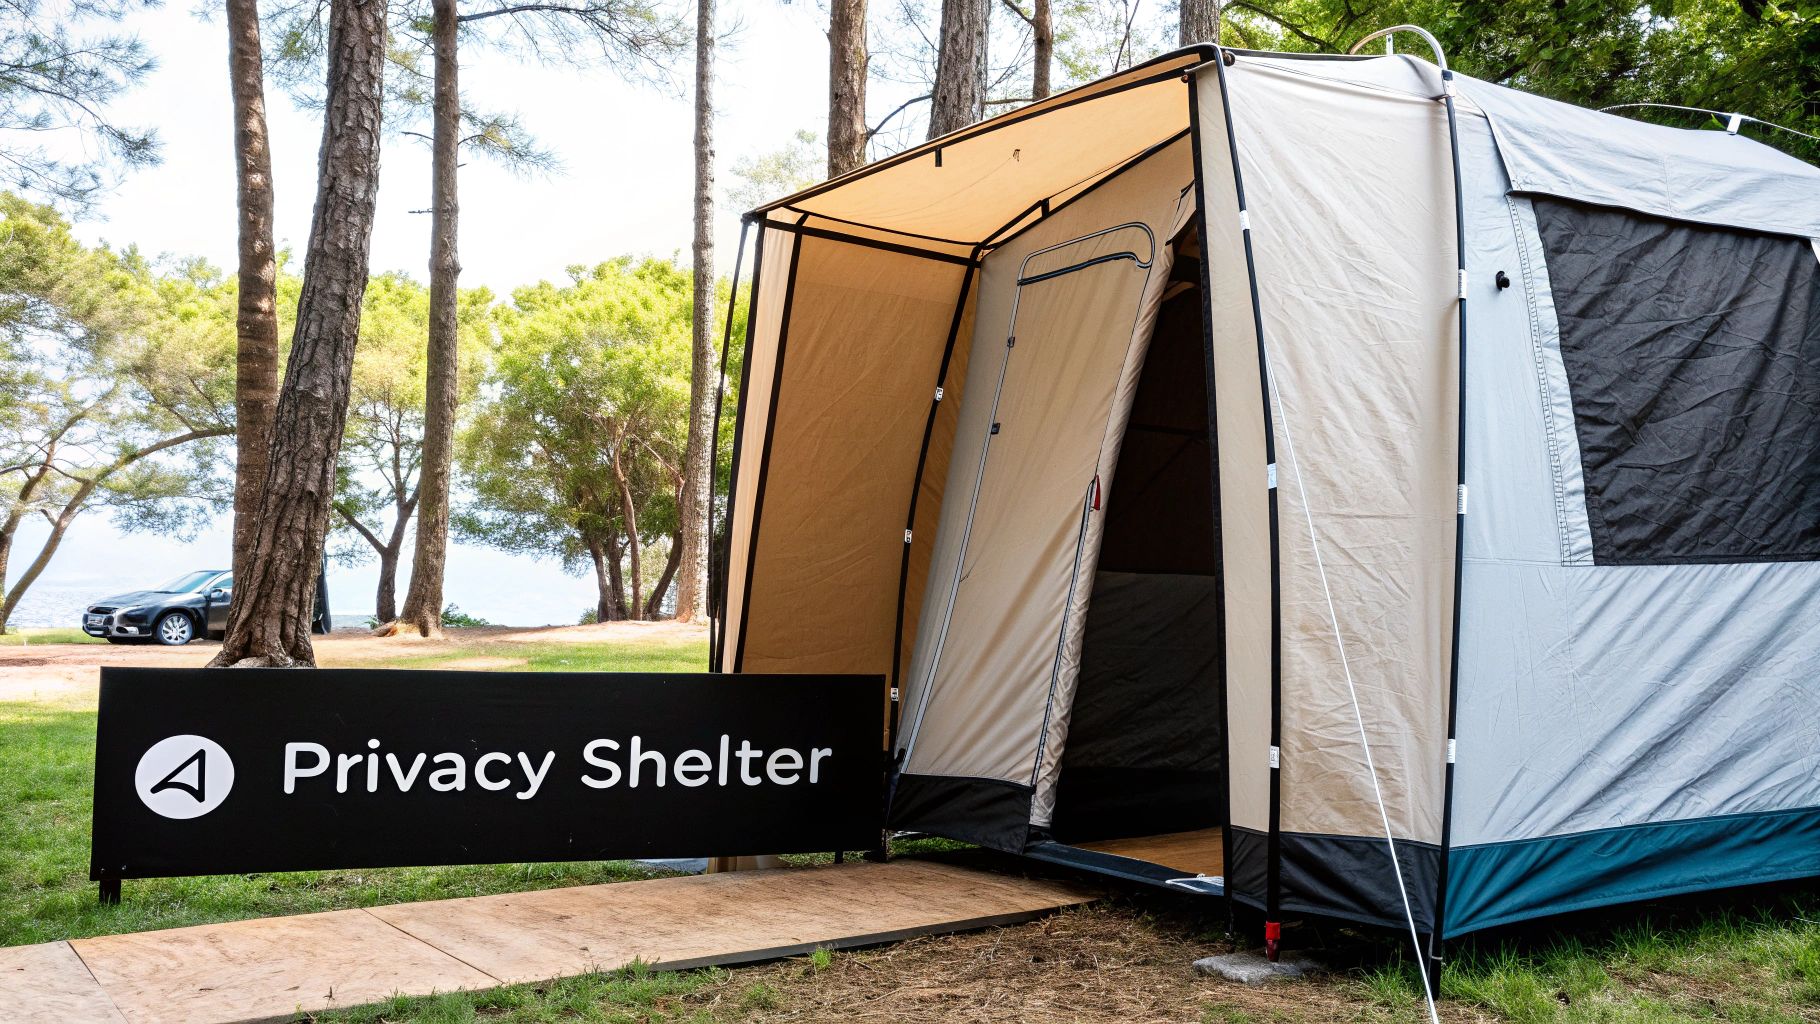
Okay, so you’ve picked out a portable toilet. That’s a great start, but it's only half the battle. Let's be honest, true comfort when you’re doing your business comes from privacy, and that’s where a good shelter comes into play. Think of it as the walls and door for your personal outdoor bathroom—it’s what turns a simple potty in the woods into a proper, civilized restroom.
A privacy shelter does more than just shield you from prying eyes. It’s your defense against the elements, like a sudden gust of wind or a pop-up rain shower, making the whole experience way more pleasant. It also carves out a dedicated, hygienic space, keeping your toilet setup separate from where you eat and sleep. Without one, you're just a person on a toilet in the middle of nowhere; with one, you’ve got a real bathroom.
Not all privacy shelters are built the same. They generally fall into two buckets, and the right one for you really depends on what you value more: lightning-fast setup or rock-solid stability.
For a quick weekend trip where the weather looks calm, a pop-up is usually perfectly fine. But if you're setting up camp for a week, or you're in an exposed spot where the wind could be an issue, the sturdiness of a pole-supported model is worth its weight in gold.
When you're shopping for a privacy tent, the little details make a big difference. Certain features can take your outdoor bathroom from just "functional" to genuinely comfortable. After all, this isn't just a fabric box—it's a small, functional room that needs to work for you.
You're looking for a good mix of durability, ventilation, and thoughtful conveniences. A well-designed shelter feels like a solid piece of gear. Here are the things I always tell people to check for:
A great privacy shelter doesn't just hide you; it enhances the entire experience. It’s the difference between a makeshift solution and a truly comfortable, civilized outdoor bathroom.
Putting your shelter up correctly is key to making sure it stays put for your whole trip, especially if the ground isn't perfectly flat. The goal is a secure, level space that won't decide to take flight in the middle of the night.
First, pick your spot. Find a patch of ground that's as flat as you can get, and clear away any sharp rocks or roots that could tear up the floor. If you've got a pop-up, pay attention to the wind as you let it spring open so it doesn't get away from you. For pole-supported models, always assemble the poles completely first before trying to raise the tent.
And the most important part: always stake it down properly. Use every single guyline and anchor point the manufacturer provides. If the ground is too hard for the dinky little stakes it came with, swap them out for heavy-duty ones. A securely anchored shelter is a safe shelter, and that's exactly what you need for a private, stable bathroom in the great outdoors.
Picking out a portable toilet is only half the battle. The real trick to making modern camping bathrooms work is knowing exactly what to do with the waste afterward. Proper disposal isn't just about keeping things clean—it's a cornerstone of ethical camping and a core principle of Leave No Trace.
Think of waste management as the final, most important piece of the puzzle. When you get it right, you're doing your part to protect the wild places we all love, ensuring they stay beautiful for the next person who comes along. With a little know-how, what sounds like a chore becomes a simple, responsible part of your camping routine.
Whether you’re at a bustling campground or deep in the backcountry, this process makes sure you leave a minimal footprint. Let's walk through the best ways to handle waste safely and respectfully.
If you're using a bucket-style toilet or any commode that relies on a bag system, the type of bag you choose is a game-changer. You can't just grab any old trash bag. You'll want to look for specialized waste bags, often called "wag bags," which are built specifically for this job.
These things are seriously heavy-duty, usually featuring a double-bag design for extra security and made from puncture-resistant material. But the real magic is inside: they come pre-loaded with a gelling powder.
This gelling agent is the secret weapon for a clean, odor-free experience. The moment liquid hits it, the powder solidifies the waste, which locks away odors, prevents spills, and even starts the breakdown process.
This simple bit of chemistry turns a messy situation into a clean, contained package. Once you're done, you just seal the inner bag, pop it into the durable outer bag, and you've got a secure, sanitary pouch that can be thrown away in any proper trash can.
For those who went with a flushing portable toilet, you'll eventually need to empty its holding tank. The only place to do this is at a designated RV dump station. These facilities are built to safely handle blackwater (that's the technical term for sewage). You can find them at most campgrounds, truck stops, and some public parks.
Finding a station is pretty easy these days, with plenty of apps and websites that point you to the nearest one. Once you’re there, the process is straightforward, but you’ll want to be careful.
Step-by-Step Guide to Using a Dump Station:
When you're way out there, far from any facilities—especially when backpacking or what is dispersed camping—the cathole method is the gold standard. This technique is for human waste only and involves digging a small hole to bury it. Knowing how to do this right is absolutely key to minimizing your impact on the environment.
This is a backcountry-only method, for when there are zero other options available.
The whole thing hinges on digging the hole in the right spot and to the right depth.
After you've done your business, fill the hole back in with the dirt you dug out and cover it with some natural materials like leaves or pine needles to disguise it. And always, always pack out your toilet paper in a sealed bag. Never bury it or leave it behind.
One final thought: local rules always trump general guidelines. Some sensitive ecosystems or really popular areas may require you to pack out all solid human waste, no exceptions. Before you head out, do a quick check on the regulations for the specific area you're visiting.
Okay, we’ve covered the big three: the toilet, the shelter, and how you’ll handle the waste. Now for the fun part—putting it all together into your perfect system. The best camping bathroom solutions aren't just a random pile of gear; they're a thoughtfully curated kit where every piece has a purpose and works together. The goal is to build a setup that fits your specific adventure like a glove.
Think of it like packing a toolkit. A plumber and an electrician both show up with tools, but their bags are filled with very different items. In the same way, the ideal bathroom kit for a solo backpacker will look nothing like one for a family of four on a week-long car camping trip. Let’s break down a few common setups to help you figure out what you really need.
When you're carrying everything on your back, every single ounce counts. For the solo trekker, the mission is all about minimizing weight and pack space while being a good steward of the outdoors with strict Leave No Trace principles. Comfort definitely takes a backseat to pure efficiency.
For this crew, convenience and comfort are king. With a vehicle to haul everything, weight isn’t a major concern. The focus shifts to creating a hygienic, easy-to-use experience for multiple people, especially kids who might be a little hesitant about the whole "outdoors" thing.
The boom in family camping and general outdoor recreation has really fueled the market for these convenient setups. The demand for portable sanitation is growing like crazy, which just shows a bigger trend toward wanting more comfort and hygiene when we head outside.
The numbers back this up, too. The global market for portable toilet cabins (which includes many of these camping solutions) was valued at around USD 2.5 billion in 2023. It’s projected to nearly double to USD 4.8 billion by 2032, all because more people are recognizing the importance of good hygiene in remote spots like campsites.
For those living on the road for weeks or even months at a time, the system needs to be durable, self-sufficient, and as low-maintenance as possible. The game is all about minimizing the need to find services like dump stations while maximizing capacity.
No matter which kit you're building, some accessories are just non-negotiable for keeping things clean and convenient. Think of this as your universal add-on list to complete your core setup.
Building the right kit can honestly transform your entire camping experience. For a wider look at what to pack, check out our guide on the 10 best camping essentials to make sure you're ready for your next adventure.
Even after picking the perfect toilet and shelter, you've probably still got a few things rattling around in your head. That's totally normal. Getting the little details right is what turns a decent camping bathroom experience into a fantastic one. Let's dig into some of the most common questions campers have so you can head out feeling like a pro.
Think of this as the final checklist for your outdoor throne room. Nailing these points means your setup will run smoothly, stay clean, and be the last thing you have to worry about on your trip.
This is the big one, right? Nobody wants a stinky campsite. The trick to odor control really comes down to the kind of toilet you have. It’s not just about masking smells—it’s about stopping them before they even start.
For any kind of flushing toilet, those special holding tank chemicals are your best friend. Seriously, don't skip them. These liquids or pods are made to chemically break down waste and neutralize odors right at the source, and they work incredibly well.
If you're using a simpler bucket or bag setup, you'll want to get familiar with gelling powder. A scoop of this stuff turns liquid waste into a solid gel almost instantly, which traps odors and prevents any nightmare spills. Some old-school campers also swear by adding a handful of peat moss or coco coir after they go to soak up moisture and act as a natural deodorizer.
"The secret to an odor-free portable toilet isn't some magic product, but a solid routine. Empty it often, use the right chemicals or additives every time, and make sure there's some airflow. That's the trifecta for a fresh-smelling camp bathroom."
Beyond what you add to it, timing is everything. Emptying your toilet frequently, especially when it's warm outside, is one of the easiest ways to keep smells from building up. And when you get home, a quick wipe-down with a disinfectant spray will keep it fresh for your next adventure.
Camping in the cold throws a few curveballs at your bathroom situation. If you'm not careful, freezing temperatures can put some toilets completely out of commission.
Your biggest worry is with flushing toilets, because any water in the tanks can freeze solid and crack the plastic. The solution is simple: add a non-toxic RV antifreeze to both the freshwater tank and the holding tank. This stuff protects all the internal parts and keeps things from turning into a block of ice.
That said, for pure, dead-simple reliability in the cold, it's hard to beat a bucket-style toilet. With no water to freeze or moving parts to break, they are basically foolproof in sub-zero weather.
A couple of other things to think about for winter comfort:
This is a super important question, because using the wrong TP can cause some serious clogs and disposal problems. The answer really hinges on your setup.
For flushing toilets that you plan on emptying at an RV dump station, you absolutely have to use quick-dissolving RV or marine toilet paper. The regular stuff from home is just too thick and won't break down, which can easily clog the valves and hoses at the dump station—a mess you do not want to deal with.
If you're using a bucket and bag system, where you're just tying off the bag and putting it in the trash, standard toilet paper is usually just fine. Since everything is contained in the bag, there's nothing to clog.
And for anyone digging a cathole in the backcountry, stick with unscented, biodegradable toilet paper. To really follow Leave No Trace principles, the best move is to pack out your used TP in a sealed, dark-colored bag instead of burying it.
Composting toilets aren't hard to maintain, but the upkeep is definitely different. It’s less about constantly emptying them and more about managing the little ecosystem inside.
Your main job is to toss in a scoop of a carbon-based material, like coco coir or peat moss, into the solids bin after each use. This is the key ingredient that soaks up moisture, keeps odors down, and gets the composting process going.
The liquids bottle needs to be emptied pretty often, usually every day or two. The solids chamber, on the other hand, can go for weeks or even months before it needs to be dealt with, depending on how much you use it. The only real "chore" is emptying the finished compost, which you can then bag up and toss in the trash according to local rules.
At TREKOLOGY, we believe that the right gear can make any outdoor adventure more comfortable and enjoyable. Our thoughtfully designed equipment, from lightweight chairs to supportive sleeping pads, helps you create a home away from home. Explore our collection and elevate your next trip at https://trekology.com.
Leave a comment