Certified Business
With over 10,000 orders
With over 10,000 orders

Let’s be honest—nothing torpedoes a great day on the trail faster than a lousy night's sleep. And the culprit is almost always a sad, saggy sleeping pad that leaves you feeling every rock and root.
Getting your sleeping pad properly inflated is the single most important step for a comfortable night outdoors. It’s not just about getting air in; it’s about creating a firm, supportive, and insulated barrier between you and the cold, hard ground. Think of it as setting the foundation for restorative sleep so you can wake up ready for whatever the next day holds.
A fully inflated pad is your best friend at camp. It provides the crucial insulation (R-value) that keeps the ground from sucking away your body heat and the structural support that cradles your hips and shoulders.
It's no surprise that campers are demanding better sleep setups. The global market for sleeping pads is valued at around $980 million and continues to grow. This isn't just a trend; it's a movement towards making outdoor experiences genuinely comfortable and sustainable. People are realizing that quality sleep is worth investing in.
A well-inflated sleeping pad is your best defense against the cold, hard ground. It’s the difference between waking up refreshed and ready for the day or waking up sore and tired.
How you get air into your pad actually matters more than you might think, especially for the pad's long-term health. While it's tempting to just use your lungs, that can introduce moisture and bacteria, which can lead to mold and break down the internal insulation over time.
To really get into the nitty-gritty of what makes a pad great, check out our ultimate buying guide for sleeping pads.
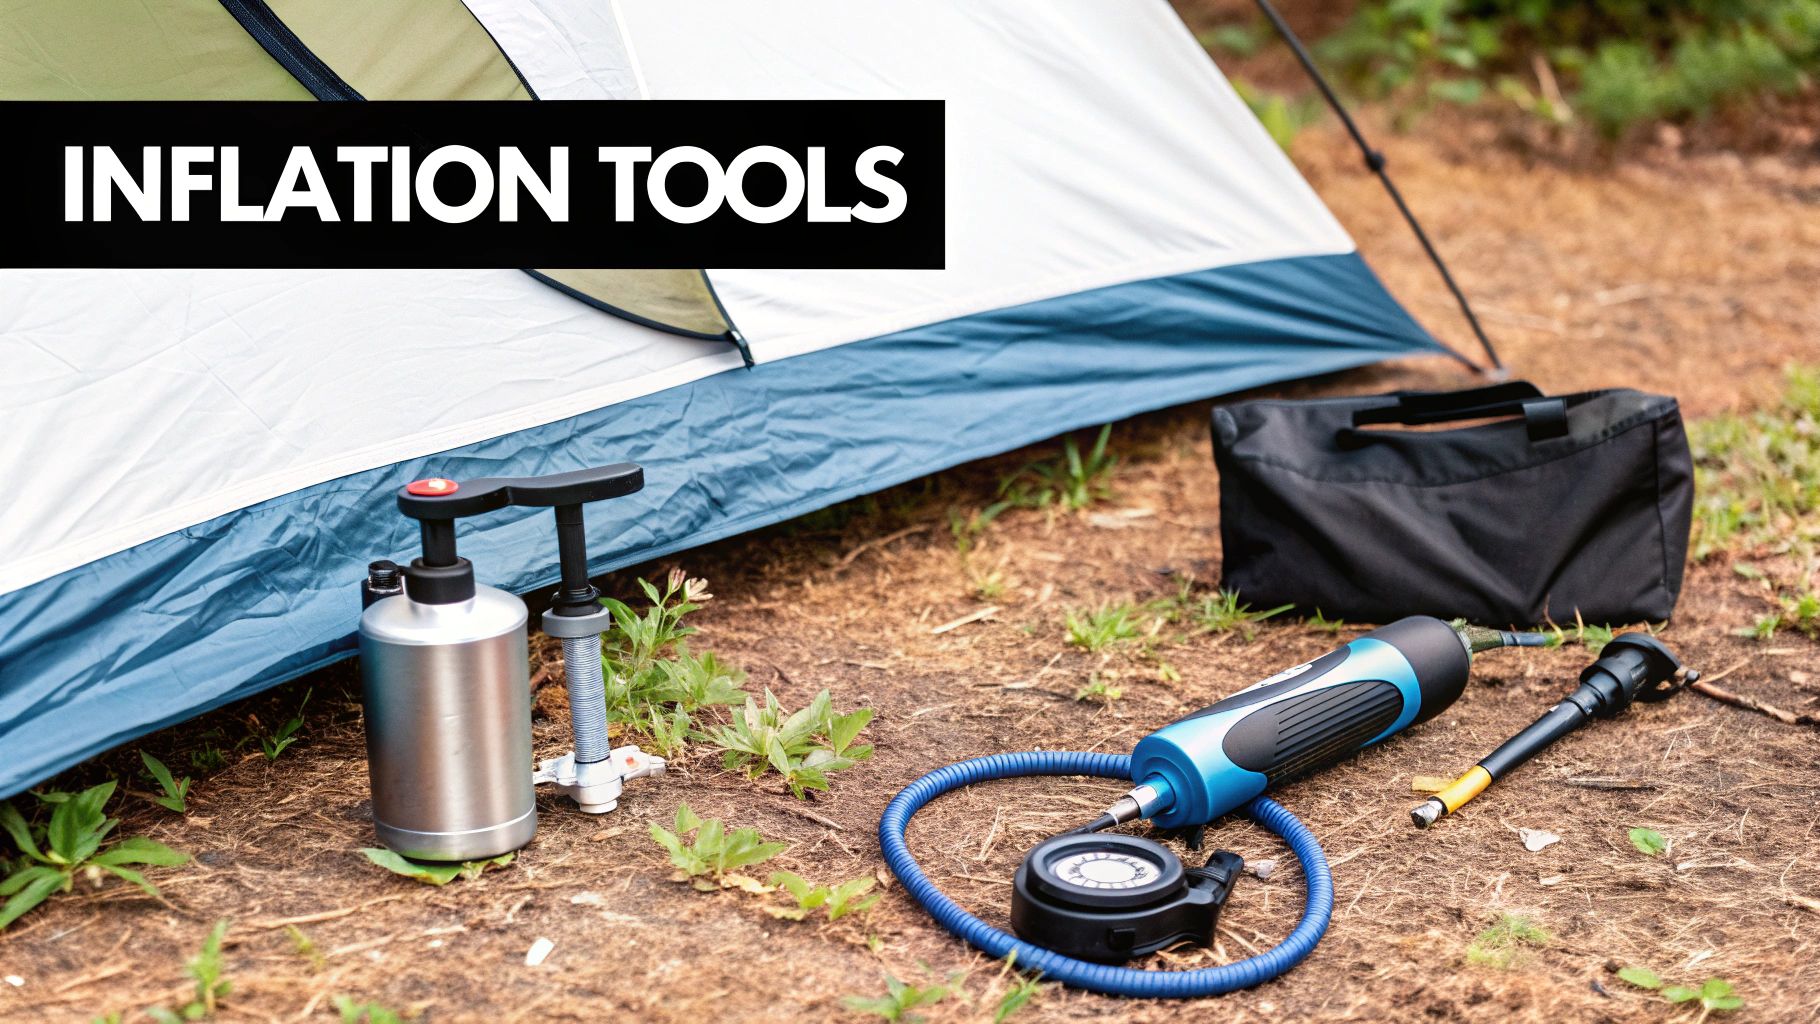
For now, let's look at the main ways to get the job done:
Choosing an inflation method comes down to your priorities—weight, convenience, or pad longevity. Here's a quick breakdown to help you decide what's best for your camping style.
| Inflation Method | Best For | Pros | Cons |
|---|---|---|---|
| Lung Power | Emergencies, non-insulated pads | No extra gear needed, fast | Introduces moisture, can be tiring |
| Pump Sack | Backpacking, protecting insulated pads | Lightweight, keeps pad dry inside, multi-use | Takes a little practice, slight bulk |
| Mini Electric Pump | Car camping, convenience seekers | Effortless and fast inflation | Adds weight and bulk, needs batteries/charging |
Ultimately, using a pump sack or an electric pump is the best way to protect your investment and ensure your pad performs at its best for years to come. It’s a small change in routine that makes a huge difference in comfort and gear lifespan.
The valve is the heart of your sleeping pad. Get to know it, and you'll have your pad inflated in no time. But let's be honest, some of them can be a little confusing right out of the box. Knowing your valve is the first step to a quick, leak-free setup after a long day on the trail.
Some older pads have a simple twist-and-pull valve. It's a classic for a reason—it's tough and gets the job done. You just twist to unlock, pull it out to open, and then push and twist again to lock it down. The only real headache is that frantic moment when you're trying to cap it before all the air you just puffed into it escapes.
That's exactly why modern valves are so much better.
Most newer pads, including the ones we design here at Trekology, use a large, low-profile flat valve. These are a massive improvement. They let air move way faster, which cuts down on both inflation and deflation time.
Many of these are smart, dual-purpose systems with a one-way flap.
A one-way valve is a total game-changer, especially when you're exhausted and just want to get your bed ready. It eliminates that rush to seal the valve before all your hard work vanishes.
Think about it: when you're using a pump sack, you can give it a full squeeze, detach it to grab more air, and the pad just sits there, perfectly holding its pressure. This one simple feature makes the whole process so much calmer and more efficient. Once you know which valve you're working with, you can use the right technique from the very first breath.
Deciding how to inflate your sleeping pad isn't just a matter of personal preference. It's a practical choice that can impact your gear's lifespan and, just as importantly, your energy levels after a long day on the trail. Let's break down the three main options: good old-fashioned lung power, a pump sack, or a mini electric pump.
Relying on your breath is obviously the "gear-free" method, but it has a hidden cost. Every time you huff and puff into that valve, you're introducing moisture. Over time, that dampness can breed mold or mildew inside your pad, which seriously compromises the insulation and can leave you shivering on a cold night.
For most backpackers I talk to, a pump sack is the undisputed champion. It’s a simple, featherlight bag that you use to scoop up ambient air and squeeze it into the pad. This simple trick keeps destructive moisture out, inflates your pad with surprisingly little effort, and often doubles as a waterproof stuff sack for your sleeping bag or extra layers. It's a multi-use workhorse.
If you're car camping or just want maximum convenience, a mini electric pump like the FLEXTAILGEAR Tiny Pump is a game-changer. These little gadgets do all the work in about a minute. The trade-off is a bit of extra weight and the need to keep it charged, but for many, the convenience is well worth it.
This quick visual breaks down the process, whether you're using a pump sack or a battery-powered pump.
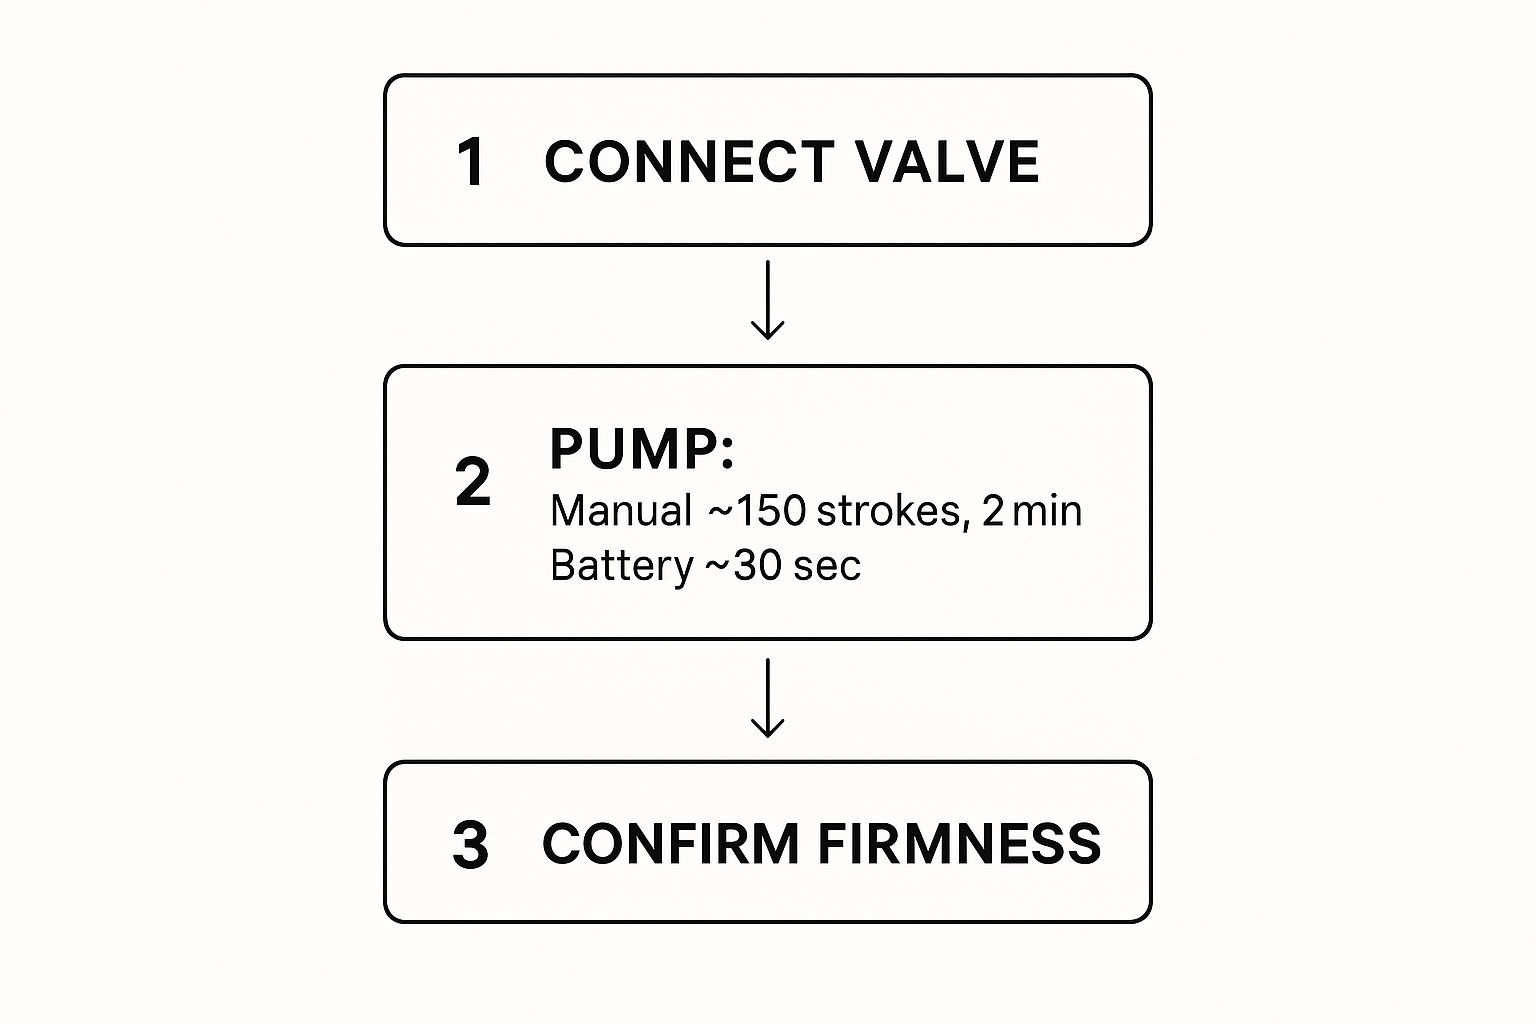
As you can see, an electric pump can seriously speed things up, but the basic steps of attaching the valve and checking the firmness are the same. This kind of efficiency and gear care is a big reason why more and more people are investing in quality sleeping systems.
Think of a pump sack or electric pump not just as a convenience, but as a way to protect your investment. You're actively preventing internal moisture damage and ensuring your pad performs well for years.
This shift towards more reliable and comfortable gear is a real trend. The inflatable sleeping pad market is expected to hit around $199.8 million by 2025—a clear sign that campers are prioritizing a good night's sleep.
While this guide is all about sleeping pads, the core inflation and deflation principles apply to a lot of other outdoor gear. For another perspective, you might find this a detailed guide on inflating and deflating boat fenders offers some interesting, transferable tips.
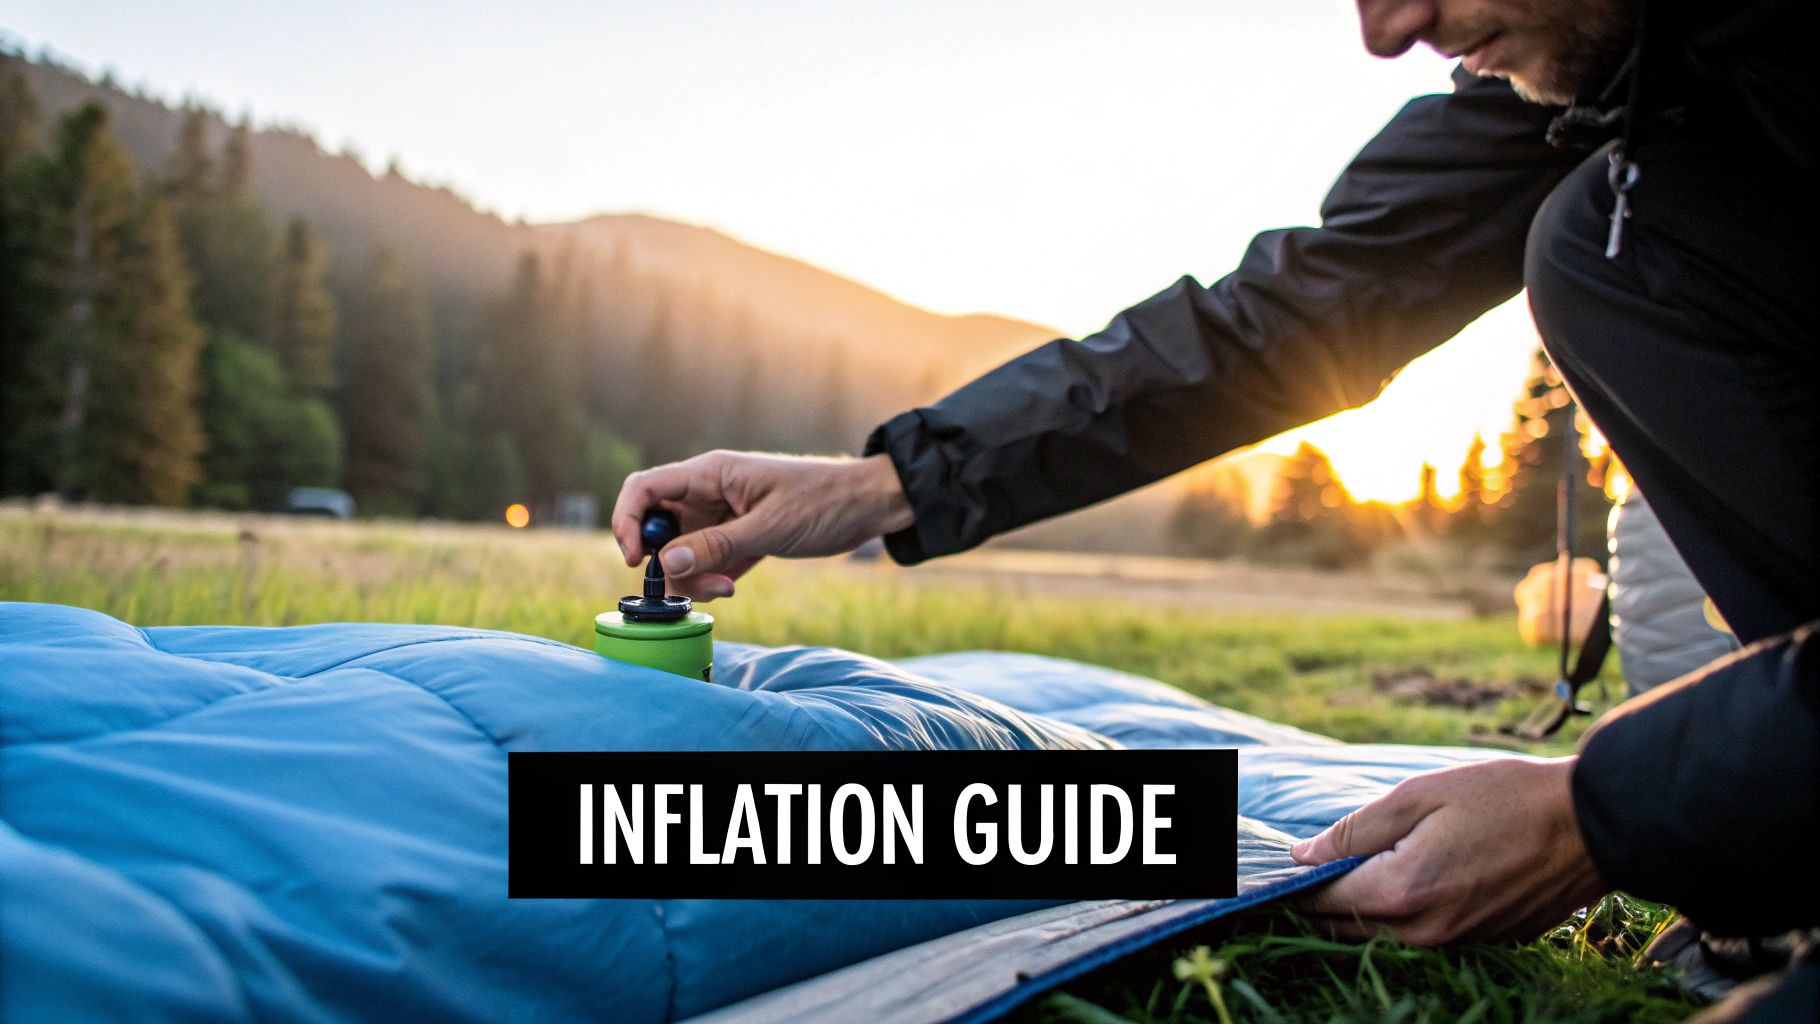 The real secret to a great night's sleep on the trail isn't just inflating your pad—it's getting the firmness just right. A pad that’s pumped up like a rock will leave your hips and shoulders aching. But one that's too soft offers almost no support, leaving you on the cold, hard ground. The trick is finding that perfect sweet spot.
I’ve found the best way to do this is with a simple "sit test." First, blow the pad up until it’s pretty firm. Then, sit right on it, mimicking how you'd normally sleep—on your back, side, or even your stomach. With all your weight on the pad, slowly open the valve and let out little puffs of air.
You’ll want to keep letting air out until your hips and shoulders feel cushioned but are still kept off the ground. The goal is to feel cradled, not like you're balancing on top of a balloon. This little adjustment makes a huge difference in comfort.
How you sleep should absolutely dictate how you inflate your pad. Taking a moment to fine-tune it can be the difference between a restless night and waking up refreshed.
Here's a pro tip: Air pressure changes with temperature. As the night gets colder, the air in your pad will contract, and it’ll feel softer. I always add a final puff or two right before zipping up my sleeping bag for the night.
This kind of customizable comfort is exactly why inflatable pads have become so popular with backpackers and campers. In fact, the market for these pads is expected to grow to around $750 million by 2033, mostly because they’re so lightweight and supportive. You can find more details on this market growth at Archive Market Research.
 No matter how tough your gear is, a stray thorn or sharp piece of granite can happen. A puncture on the trail feels like a disaster, but with the right know-how, it's just a minor hiccup. Honestly, knowing how to patch a pad is an essential backcountry skill.
This is where a good repair kit, especially one with Tenacious Tape, really shines. A trailside fix is straightforward. First, you have to find that tiny hole. If you can't hear the hiss, inflate the pad and slowly pass the back of your hand over the surface—you’ll often feel the faint puff of escaping air.
Once you’ve found the culprit, mark it. Then, clean the area thoroughly with an alcohol wipe from your kit and apply the patch. Make sure you press it on firmly, working from the center out to squeeze out any air bubbles.
Waking up at 2 a.m. on the cold, hard ground is the absolute worst. That’s the classic sign of a slow leak, and these can be maddeningly difficult to find.
Back home, the easiest method is to inflate your pad and dunk it in the bathtub. A steady stream of bubbles will give away the leak's location immediately.
Out in the wild, you can replicate this with a soapy water bottle. Just a bit of biodegradable camp soap mixed with water, spritzed over the pad, will create bubbles right where the air is escaping. It’s an old-school trick that works every time.
Taking care of your pad after a trip is the key to making it last for years. Give it a good wipe-down with a damp cloth and some mild soap. This removes the dirt and body oils that can break down the fabric over time. Critically, let it air dry completely before you put it away.
Proper storage is just as vital as cleaning. Never leave your pad crammed in its stuff sack for long-term storage. This constant compression can weaken the internal foam and insulation, reducing its effectiveness.
The best way to store your pad is partially inflated with the valve open. Slide it under a bed or hang it in a closet. This helps any lingering moisture from your breath escape and keeps the pad’s insulation from getting permanently compressed.
For a deeper dive, you can learn more about how to clean, repair, and store a sleeping pad in our comprehensive guide.
https://www.youtube.com/embed/_iTJDGKK34k
Even after you think you've got the hang of your sleeping pad, a few questions always seem to come up—especially when you’re out in the wild, miles from home. Getting the answers right can be the difference between a great night's sleep and a frustrating, sleepless one. Let's dig into some of the most common issues we hear about.
One classic head-scratcher is waking up in the middle of the night on a pad that feels way softer than when you first drifted off. The immediate fear is a slow, sneaky leak, but nine times out of ten, it’s just a bit of basic physics.
The air inside your pad was warm when you inflated it, either from your lungs or just the warmer daytime air. As the temperature drops overnight, that air cools down, contracts, and loses pressure. It's totally normal. The best fix is to simply add a few extra puffs of air right before you settle in for the night.
Another question that pops up all the time: Is it really that bad to inflate a sleeping pad with your mouth? It's quick and easy, I get it. But for insulated pads, it’s a habit worth breaking. The moisture from your breath gets trapped inside the pad's insulation, which can eventually lead to mildew and degrade its ability to keep you warm. A pump sack is always the way to go.
So, just how firm should your pad be? Honestly, there’s no magic number. It all comes down to what feels right for you.
The real goal is to find that sweet spot where the pad supports you perfectly. You shouldn't be hitting the ground, but you also shouldn't feel like you're perched on a hard, unforgiving surface. Your pad should conform to your body's shape.
Here’s a trick I use: Inflate the pad until it's completely firm, then lie down on it in your usual sleeping position. Slowly bleed air from the valve until you feel your hips and shoulders sink in just enough to be comfortably cradled without bottoming out. Side sleepers usually find a slightly softer pad helps relieve pressure points, while back sleepers often prefer a bit more firmness for solid support.
Finding that perfect comfort level is a huge part of enjoying your time outdoors. For more tips, check out our guide on how to get some good ZZZ's during camping.
Ready to upgrade your sleep system? The thoughtfully engineered pads from Trekology offer superior comfort and reliability, ensuring you wake up refreshed and ready for your next adventure. Explore our collection of sleeping pads and find your perfect match today.
Leave a comment